Les Izmore
Junior Ranger
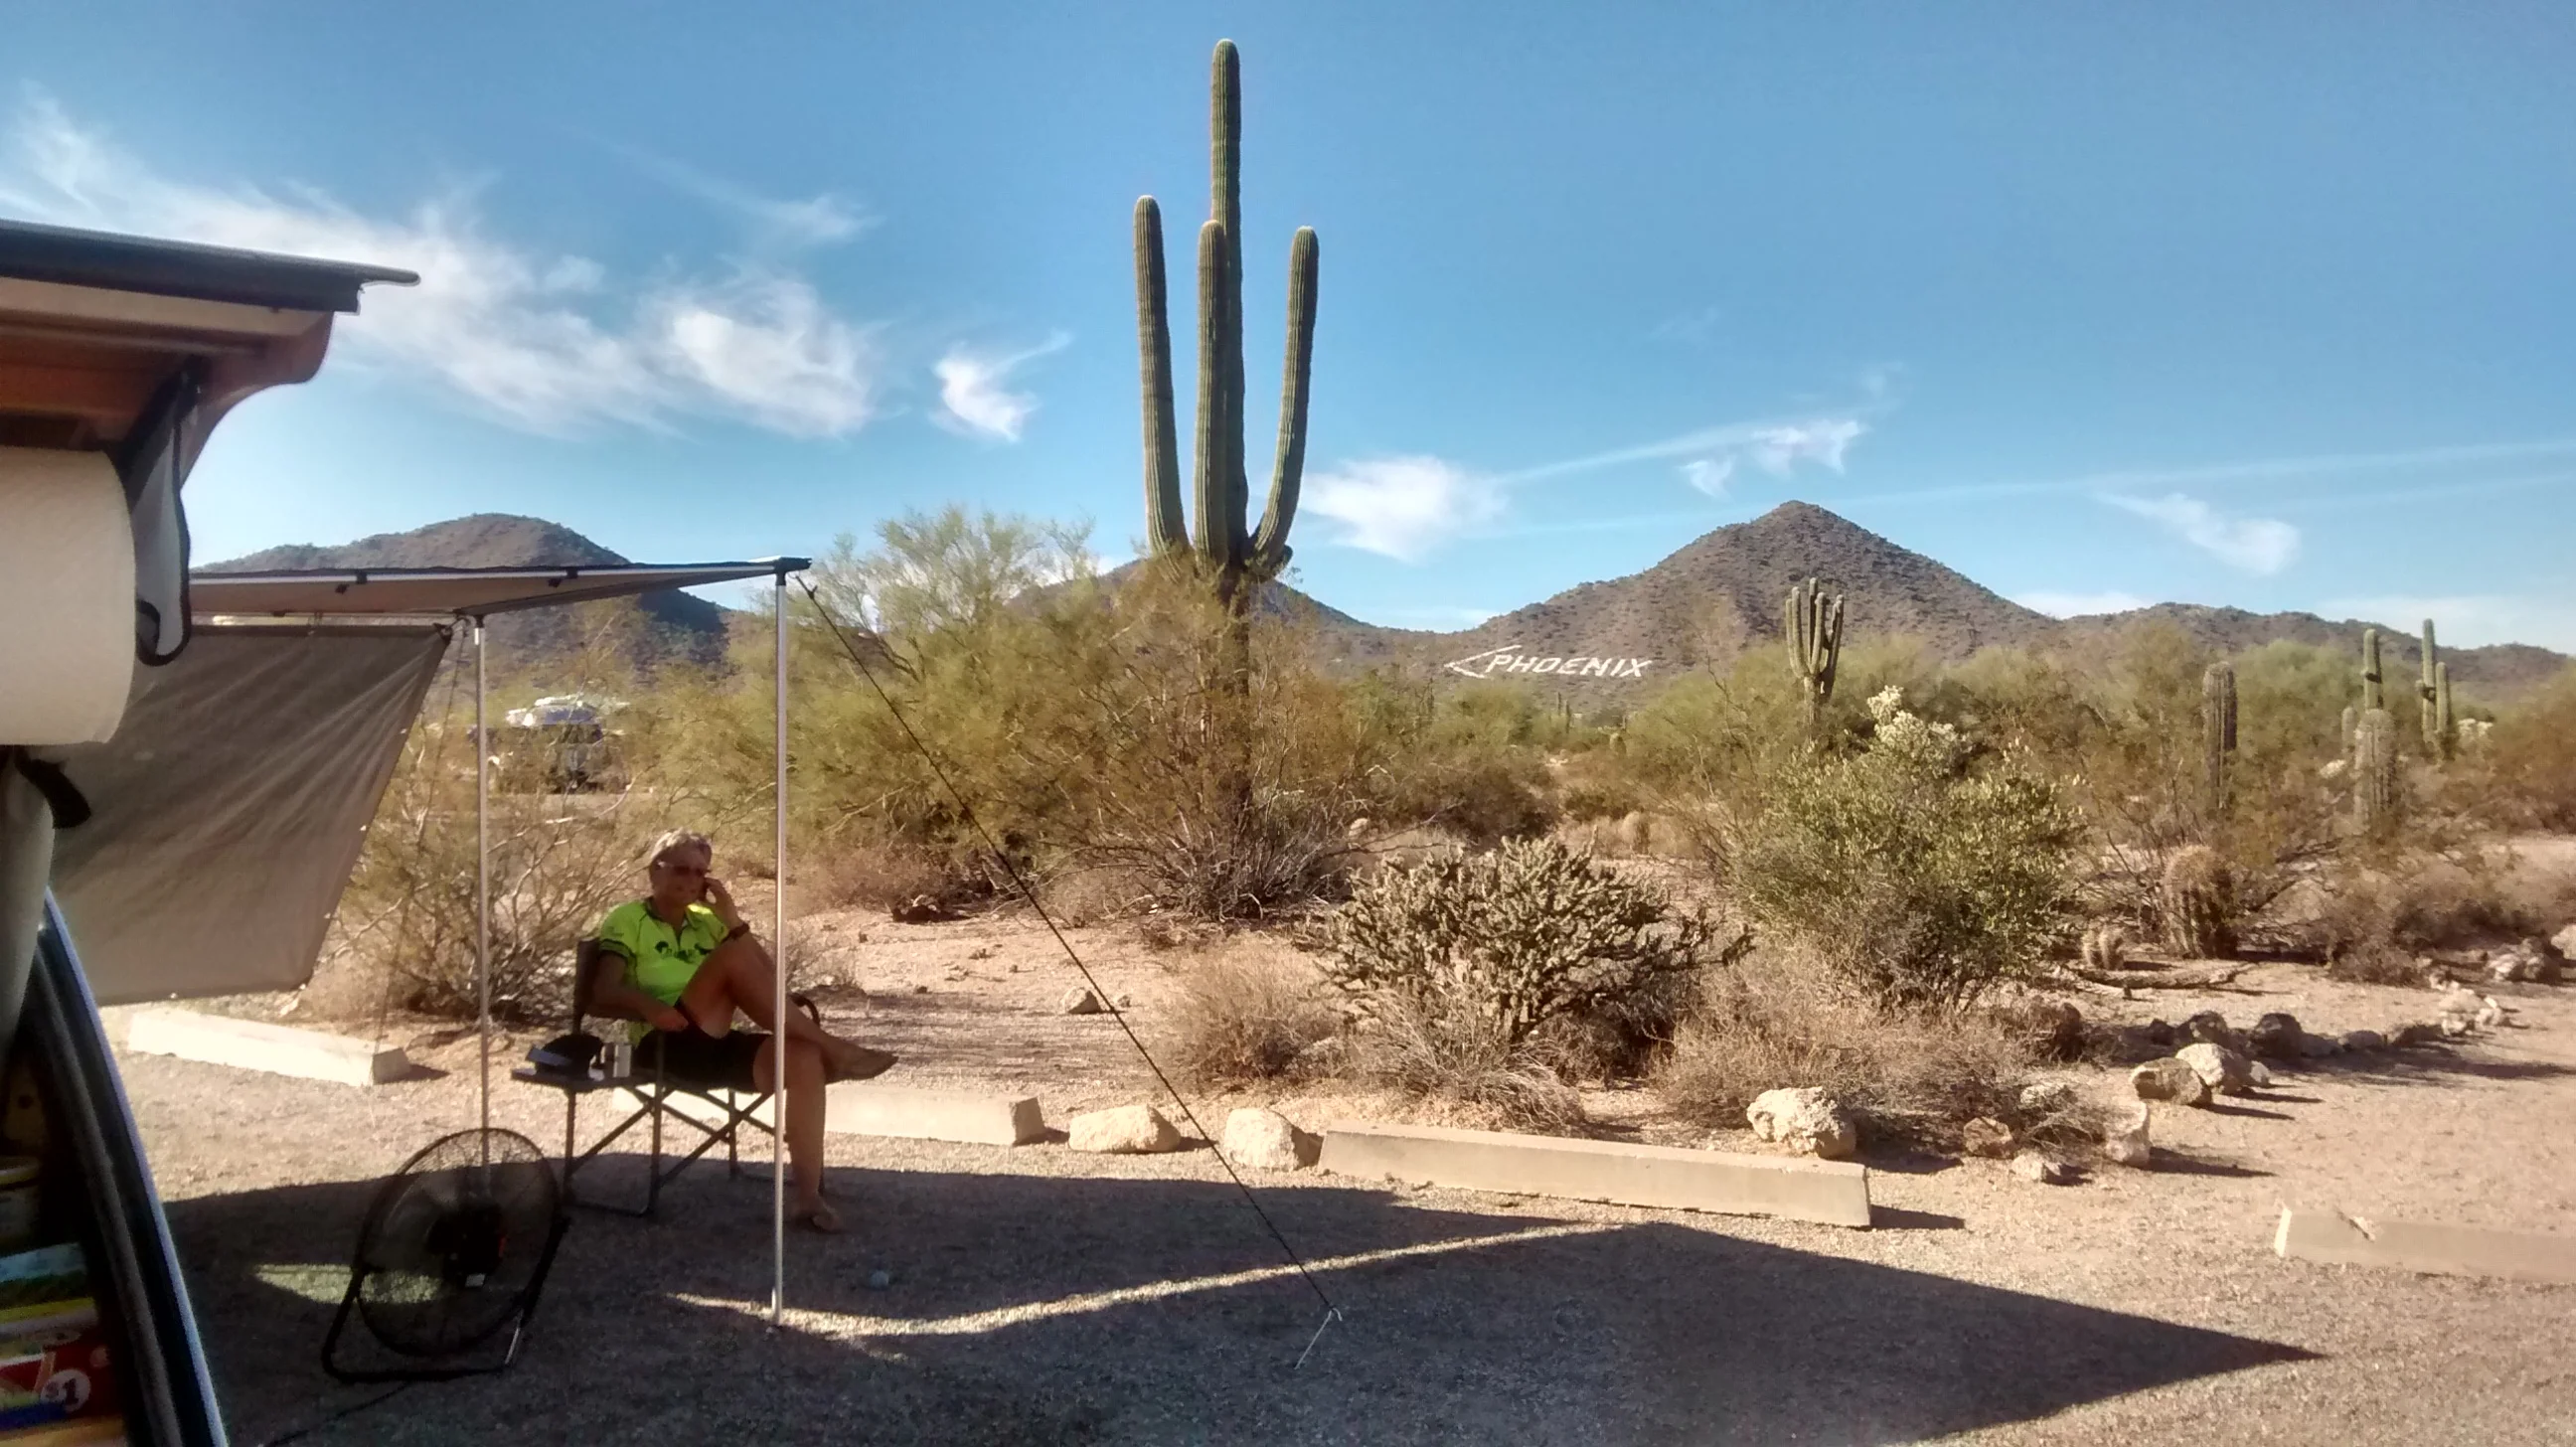
Here are some photos of our custom made rack and home grown side shade for our ARB awning, the installation of which was its own little mini-adventure within the past 15 months that we have spent on the road.
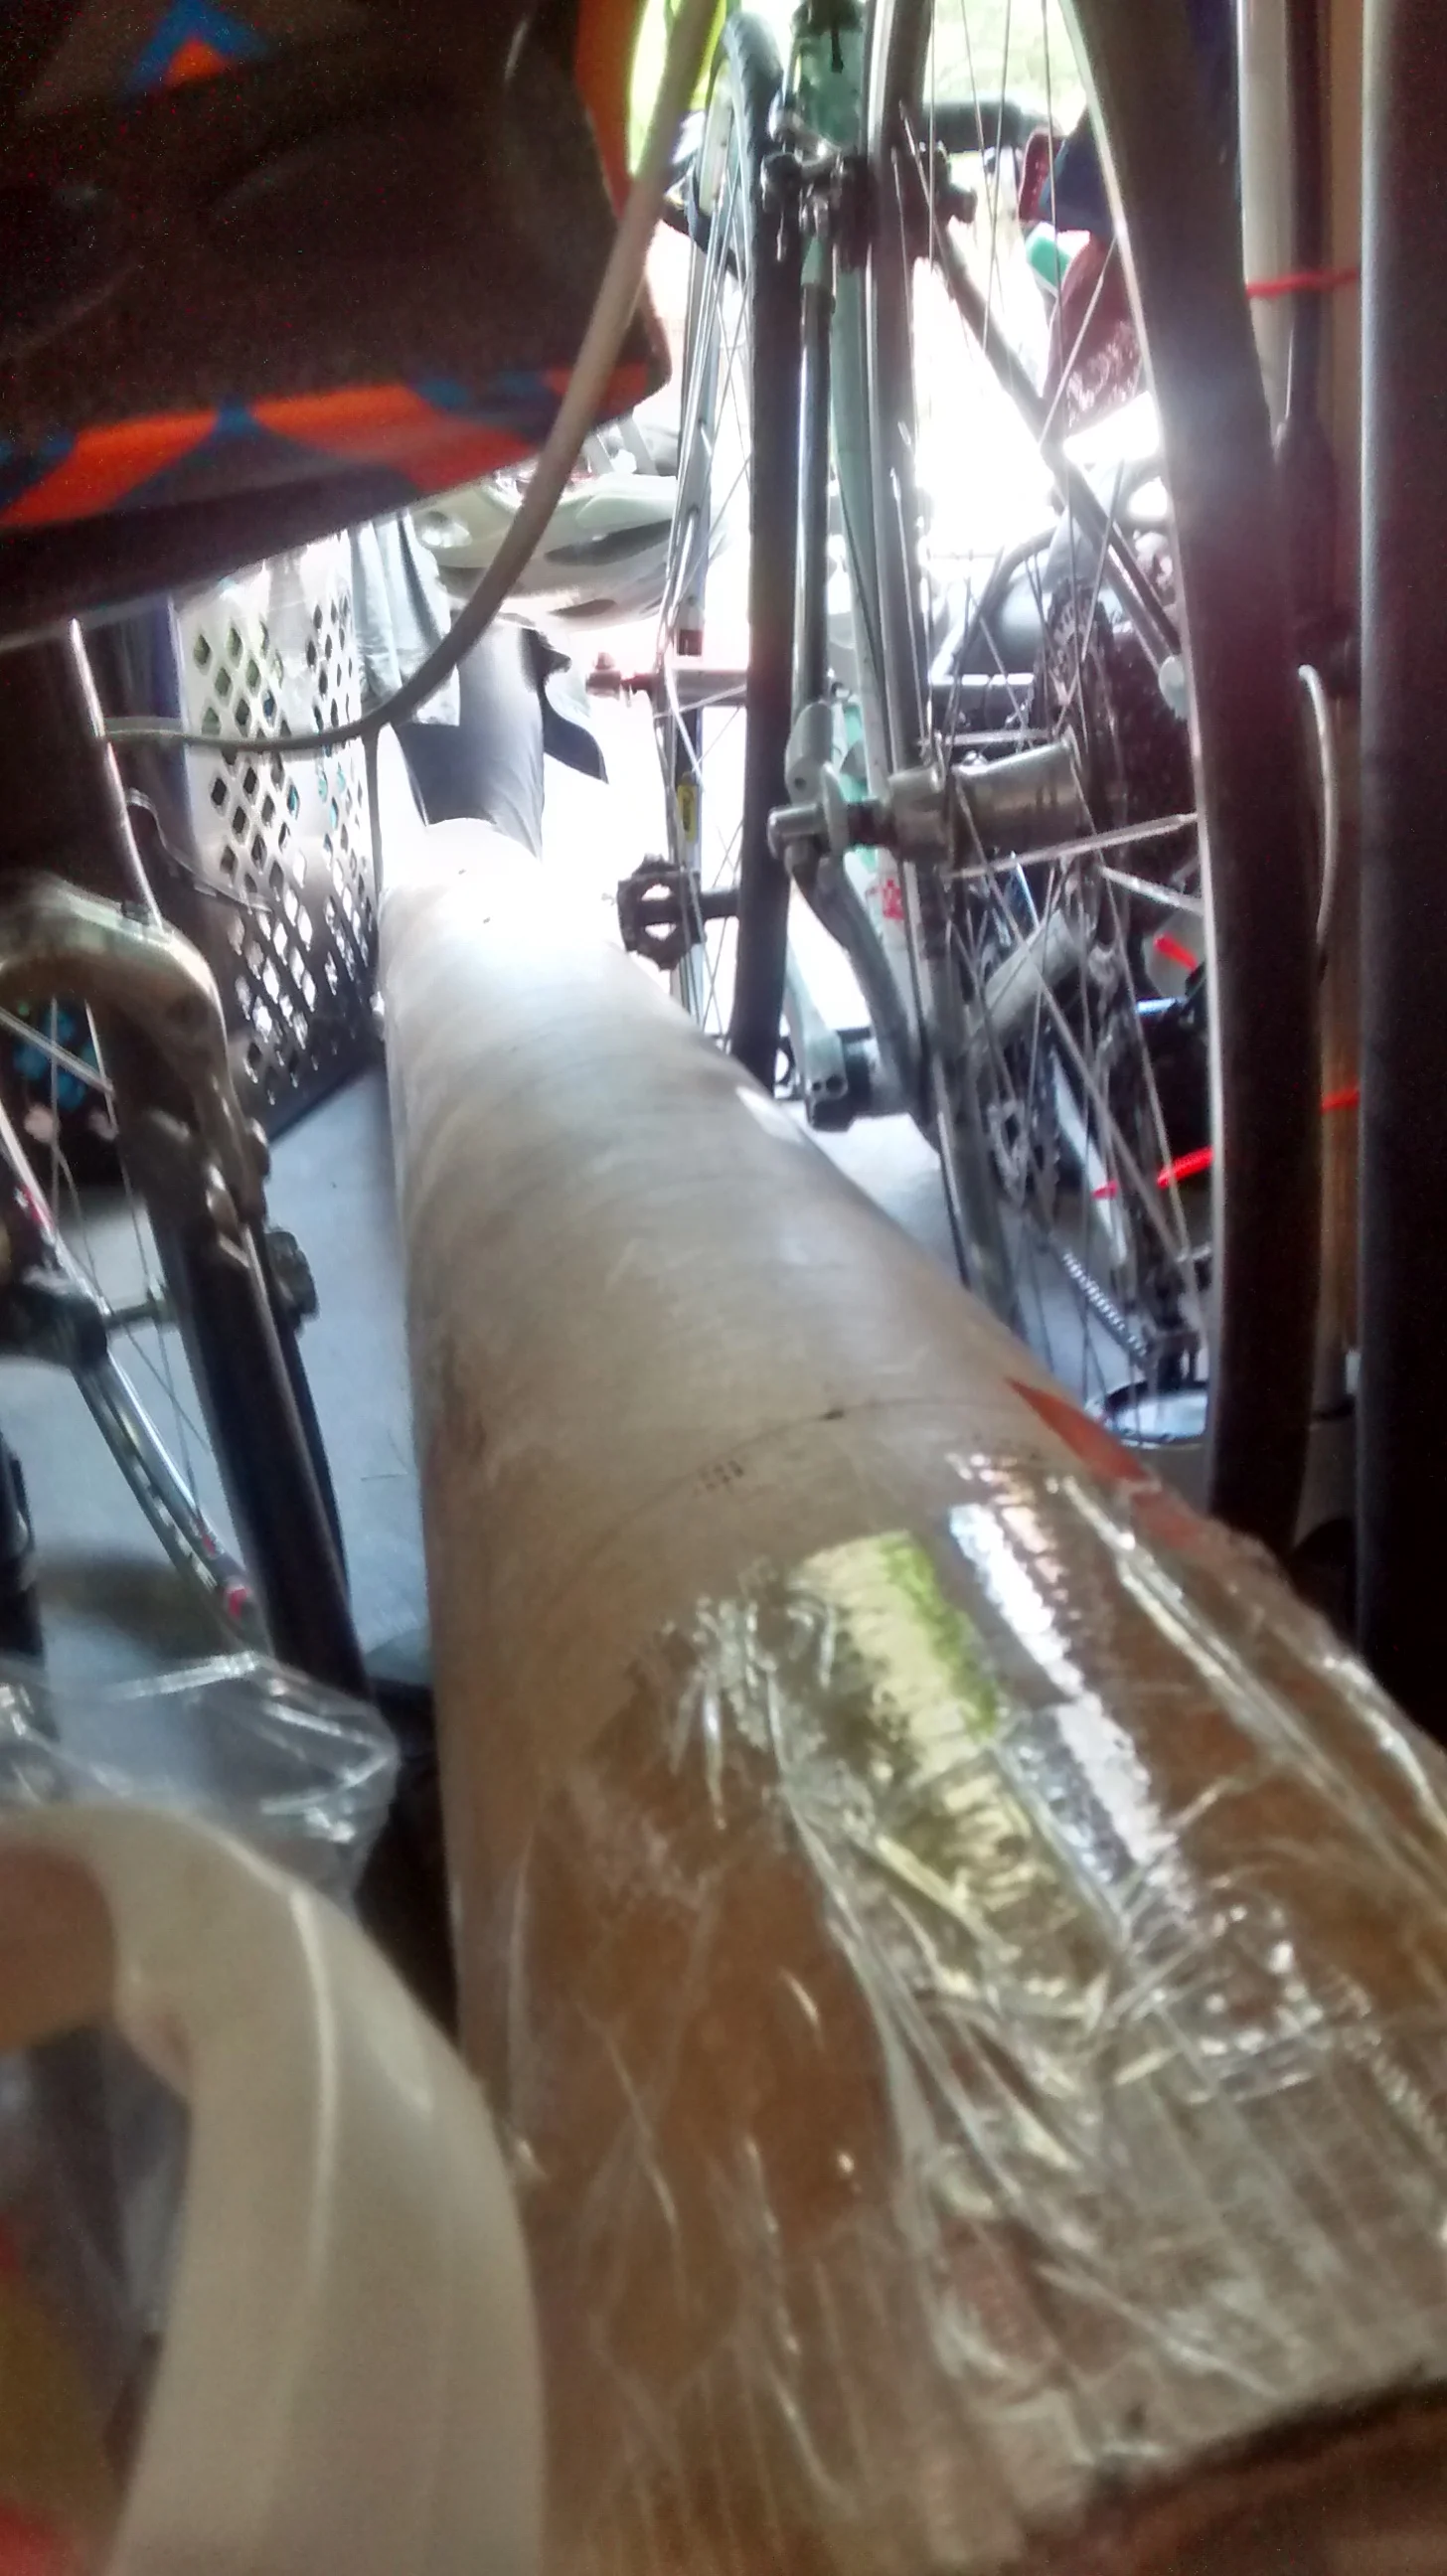
We purchased an ARB 2000 awning (2 meters by 2.5 meters, or about 6'6" by 8'), while we were on the road and I naively had my niece accept delivery for it in Dallas and drive it down to Austin for us (I apologized profusely after seeing just how big the package was - this was one time it would have been worth the $5 to pick it up at a UPS Store).
Tight Squeeze! At over 8 feet long, I was barely able to wedge this into the van for the trip back to our campsite...
The standard option for mounting these awnings is to attach it to the side of a rack basket. That would require factory rails, crossbars, probably some towers, the basket and special mounting brackets - for a total cost of probably $700-$1,000. Add in the the nearly $300 we paid for the awning, and that would have meant some very expensive shade!
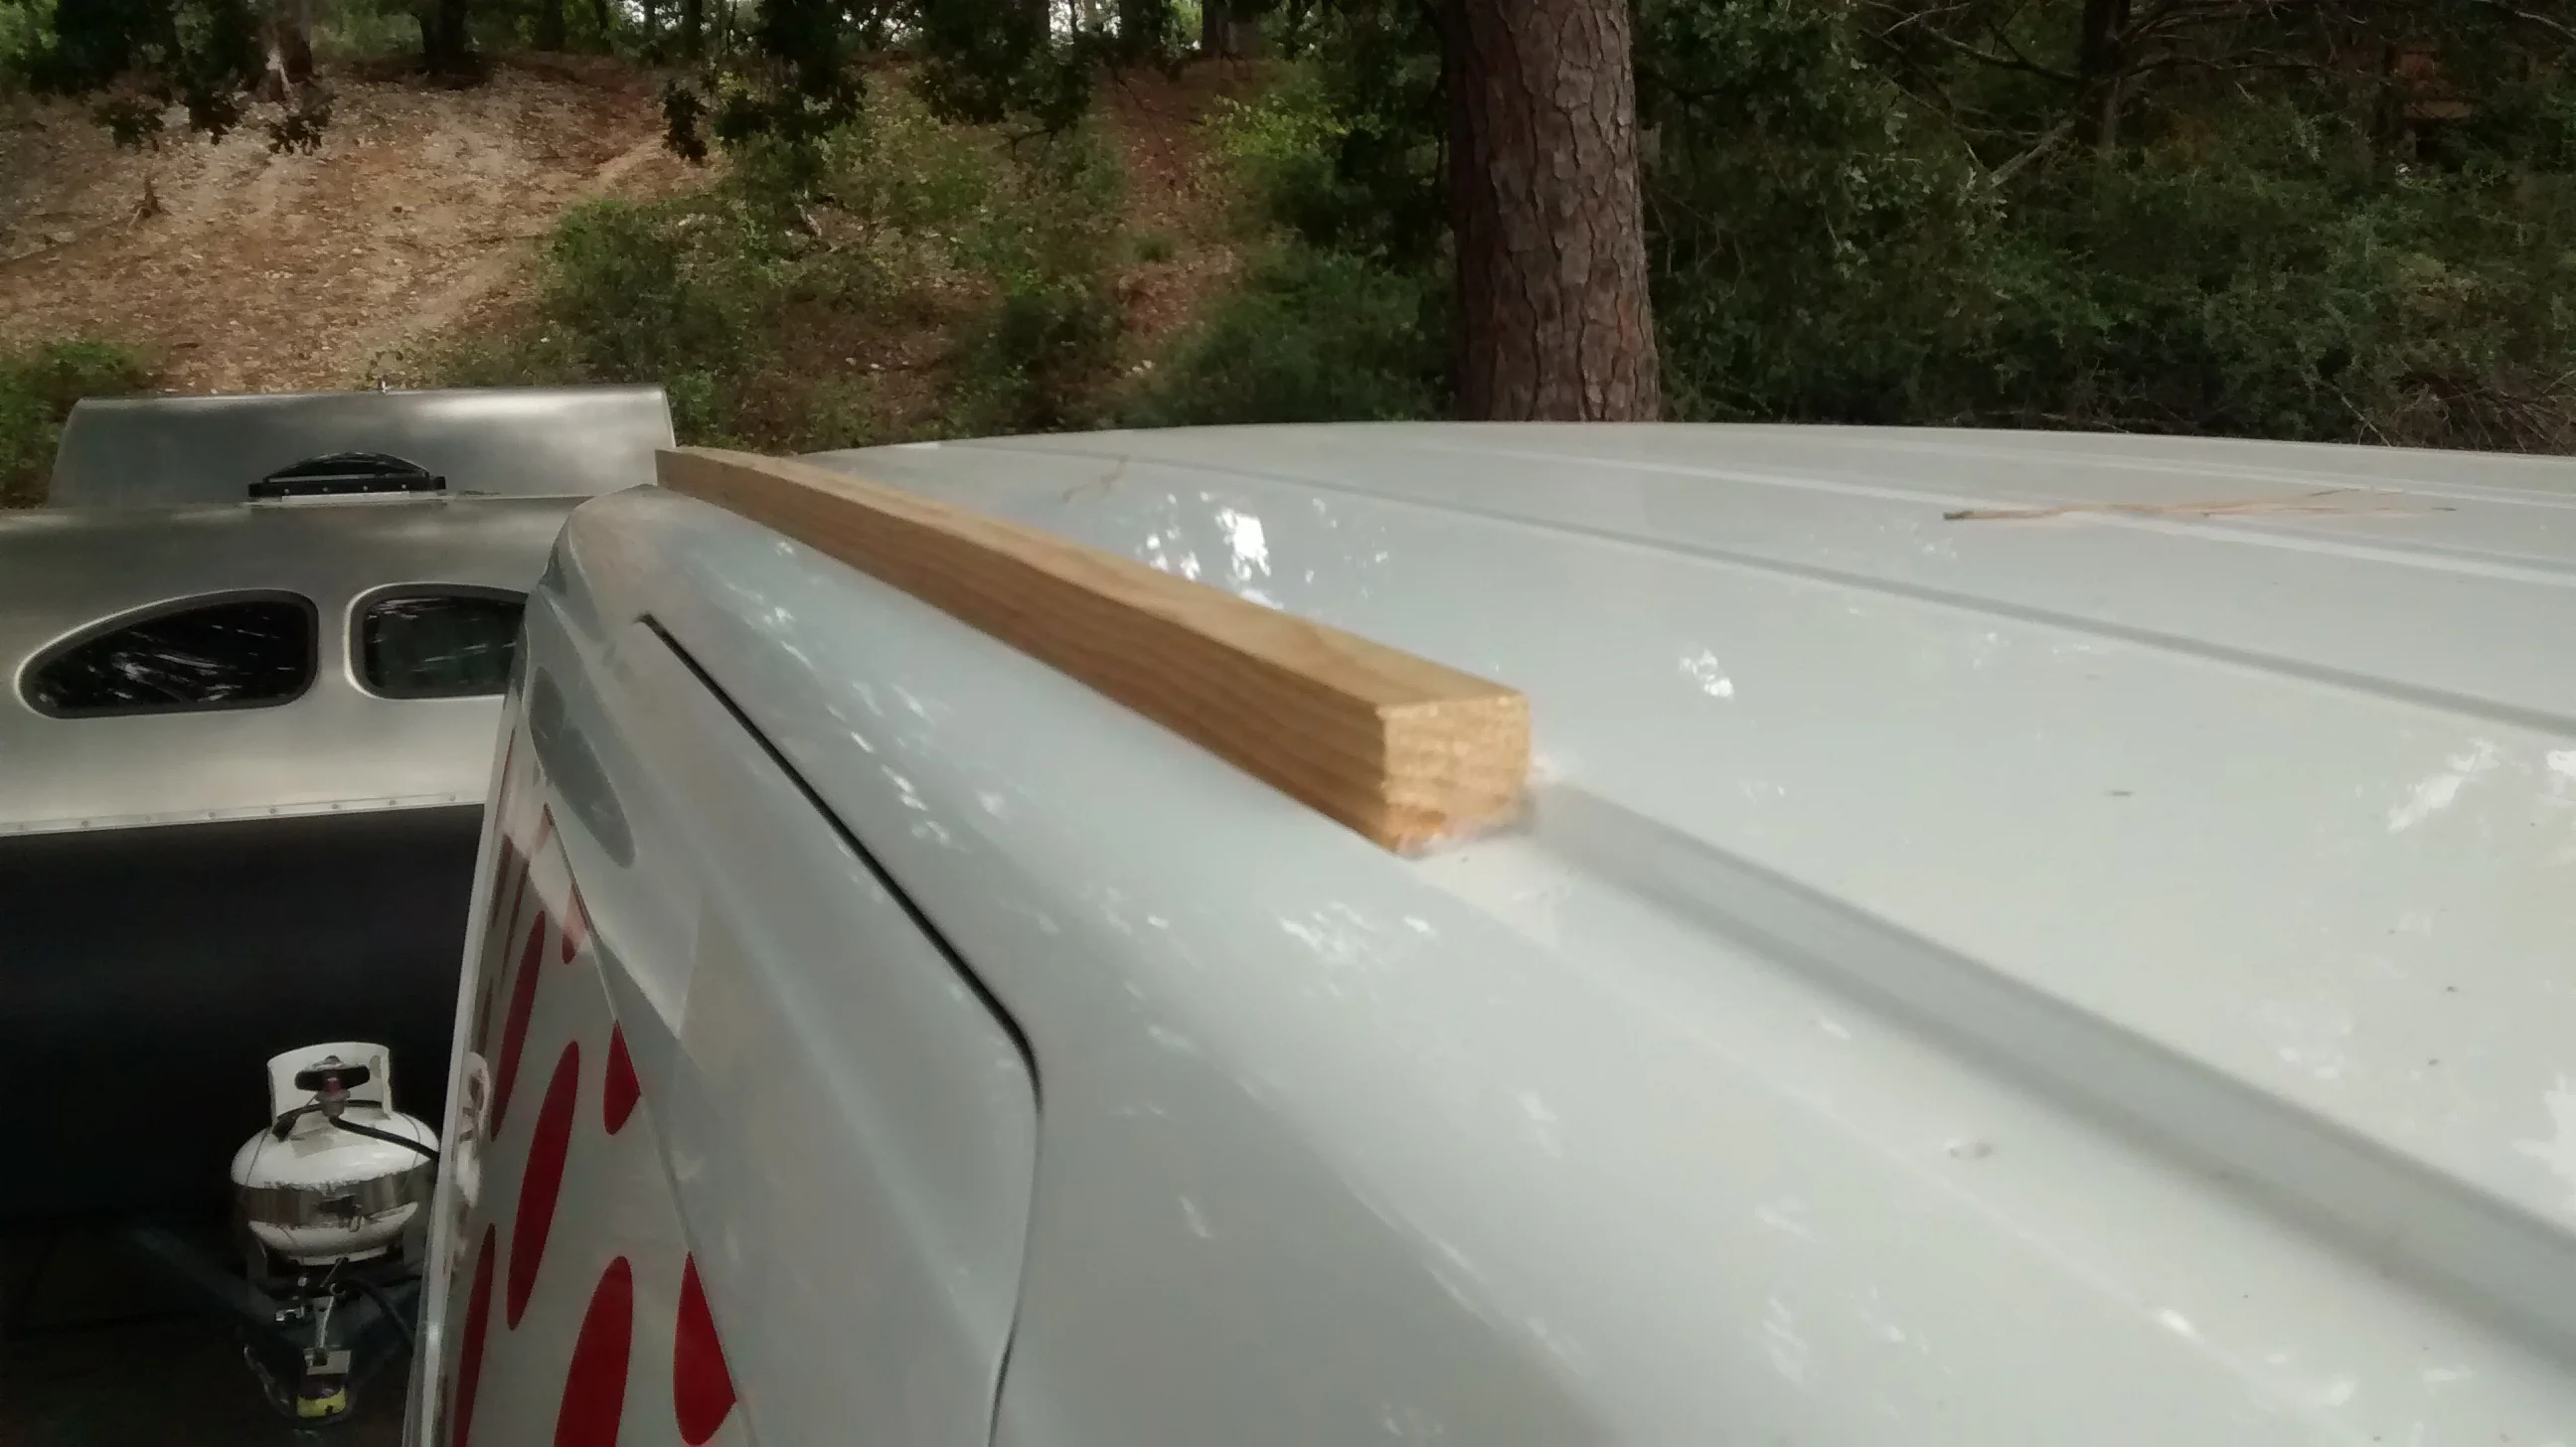
Our Ford Transit Connect van has a channel for the factory rails, with several plastic caps covering elongated holes for mounting them to the roof. I popped off four of those and cut a two by two to about 6'6" ( I got that in Jackson, MS). The roof slanted at a noticeable angle, so I used a 3/4" chisel while camping at Oil City, LA to attempt to approximate the corresponding angle along the length of the two by two (if I had access to a table saw I could have duplicated the precise angle very easily).
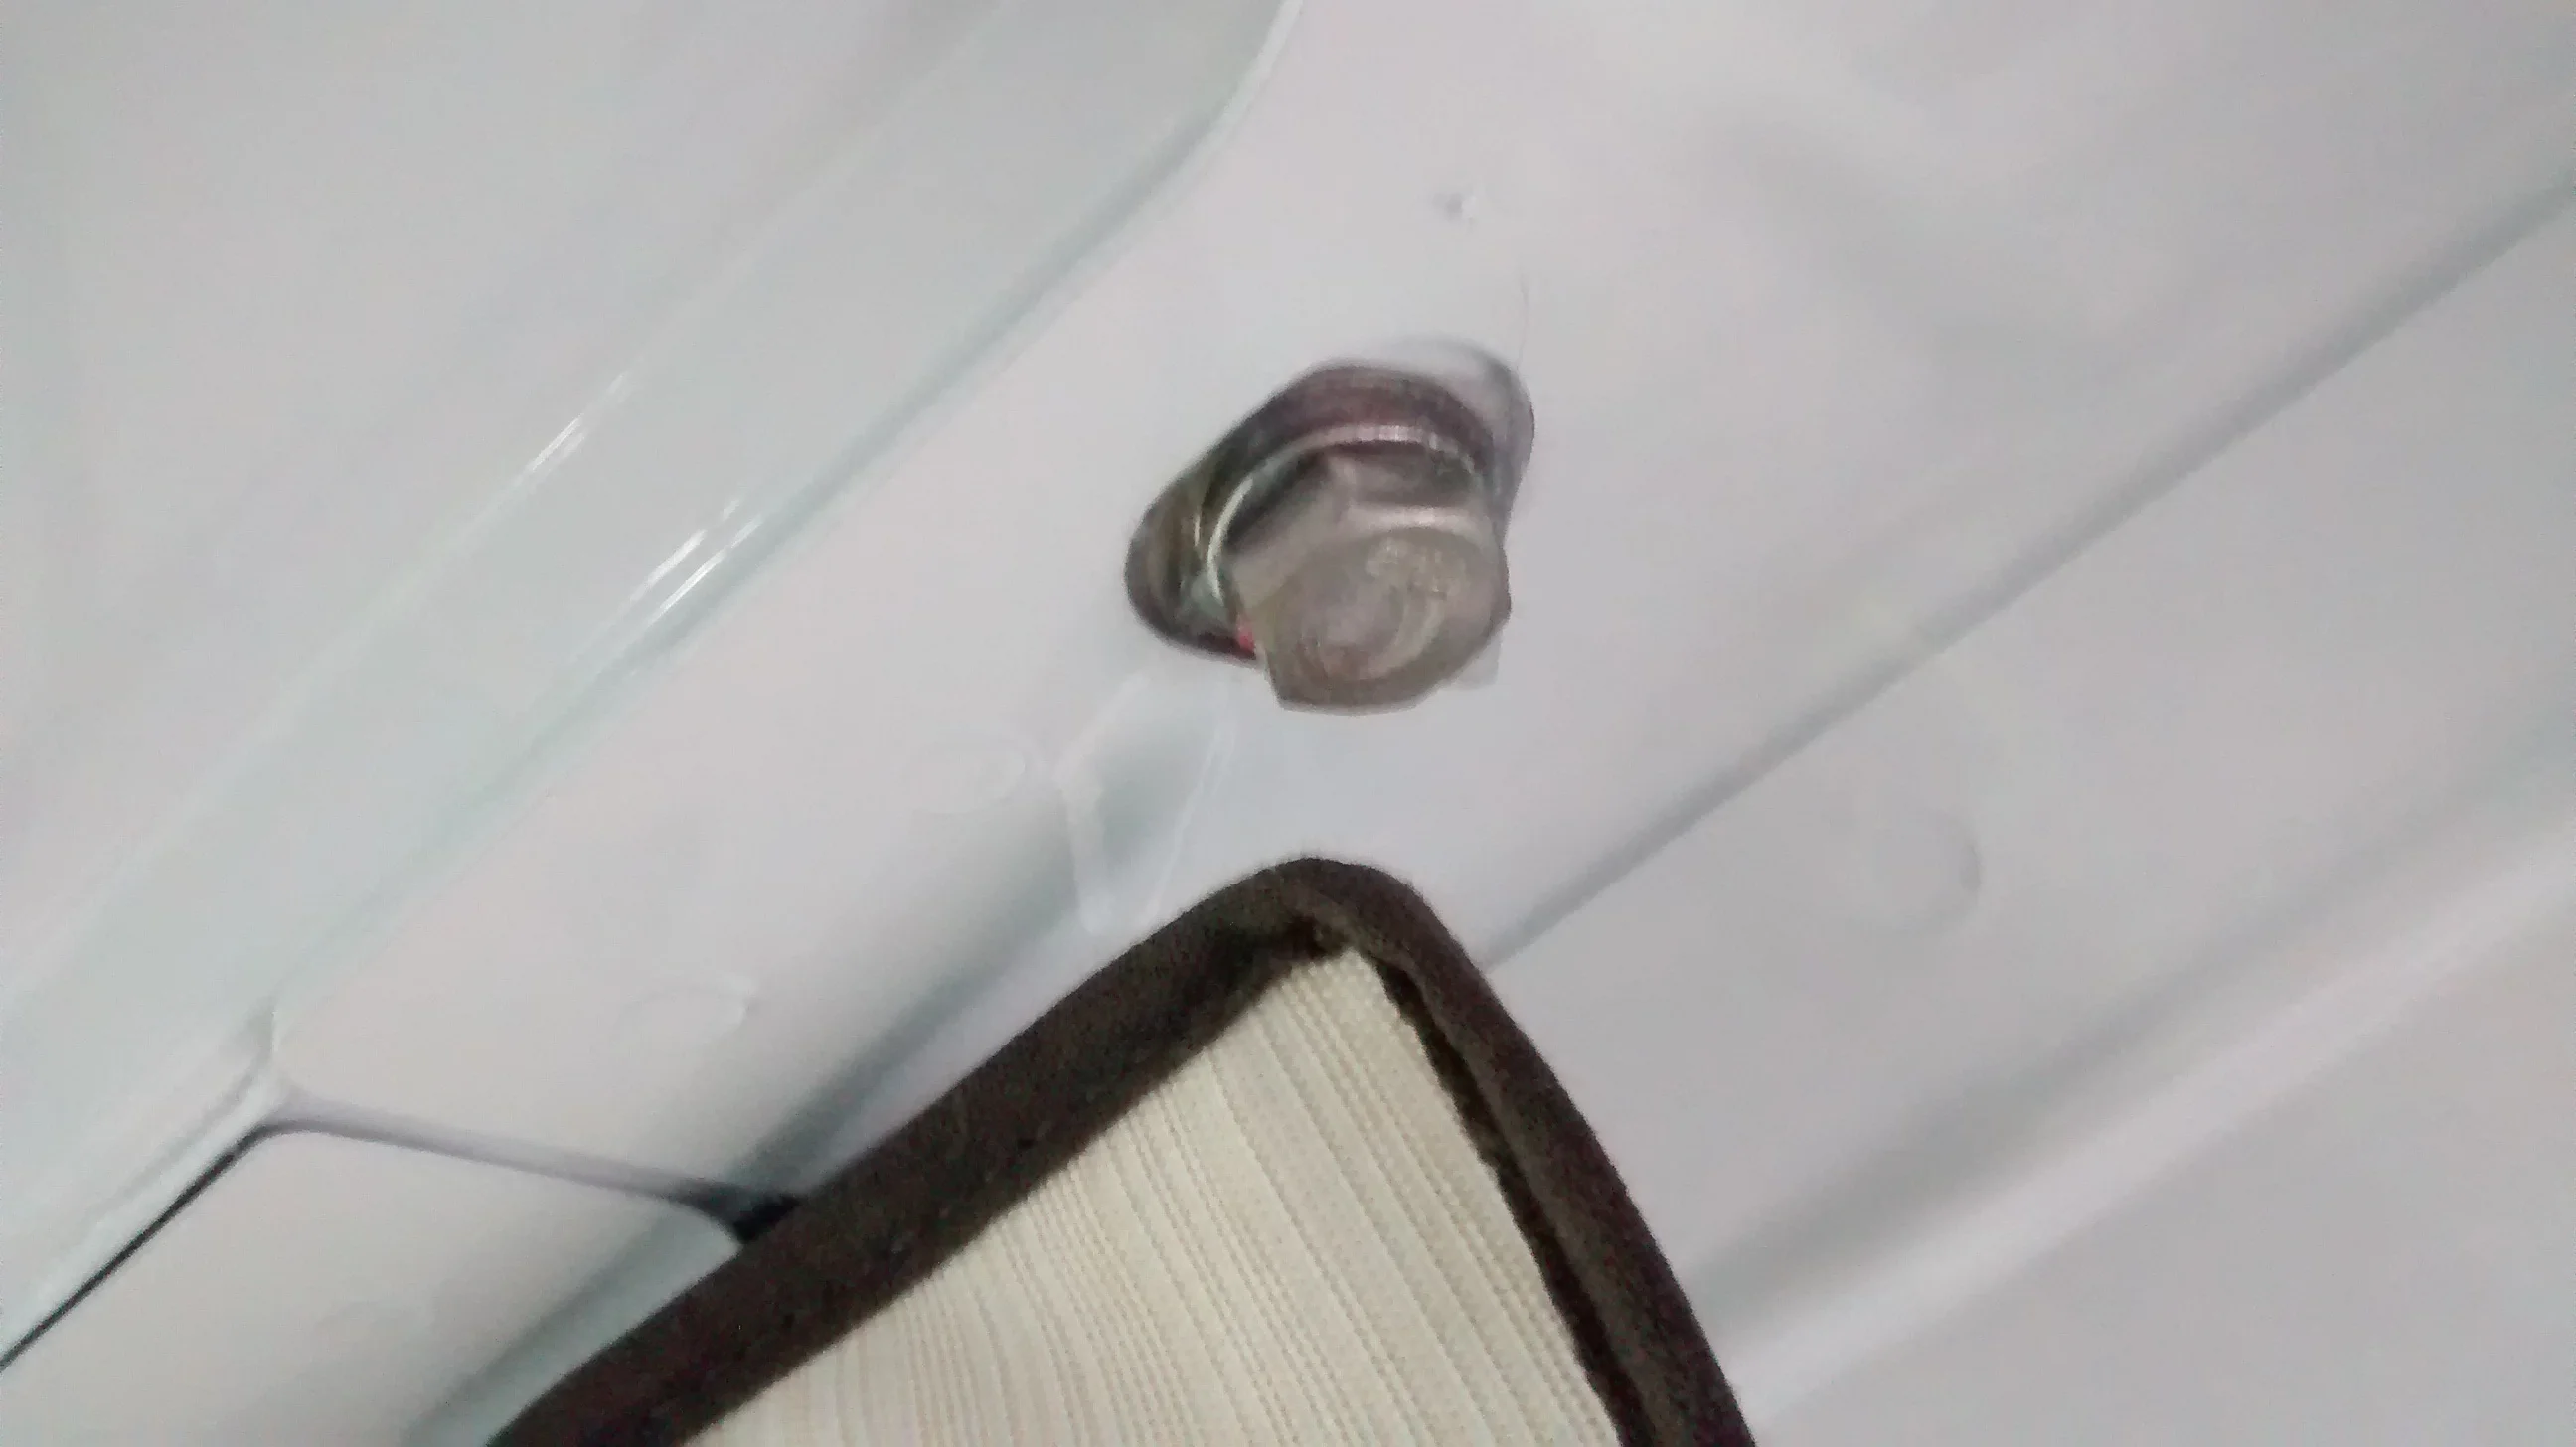
The holes allowed me to attach the two by two to the roof of the van using stainless steel lag bolts. Before doing that, I liberally applied high quality silicone between the roof and the two by two. I purchased a one foot section of T6 1/4" structural aluminum angle bracket on Amazon.com, cutting it in two pieces to create two very sturdy mounting brackets. I secured these to the two by two with additional lag bolts, attaching them with locking washers and a dash of silicone adhesive (just in case there was any shrinkage of the wood that might cause them to loosen over time).
Once I had the awning in hand in Austin, TX, I drilled the top holes in the angle brackets for mounting the topmost awning bolts (I needed to be certain of the bolt diameter before doing so). With the help of Alea and my neice Paula to hold the awning temporarily in place, I marked the location of the bottom holes. We unmounted the awning, drilled the additional holes and installed the awning. Yee-Haw! It worked. Awesome!
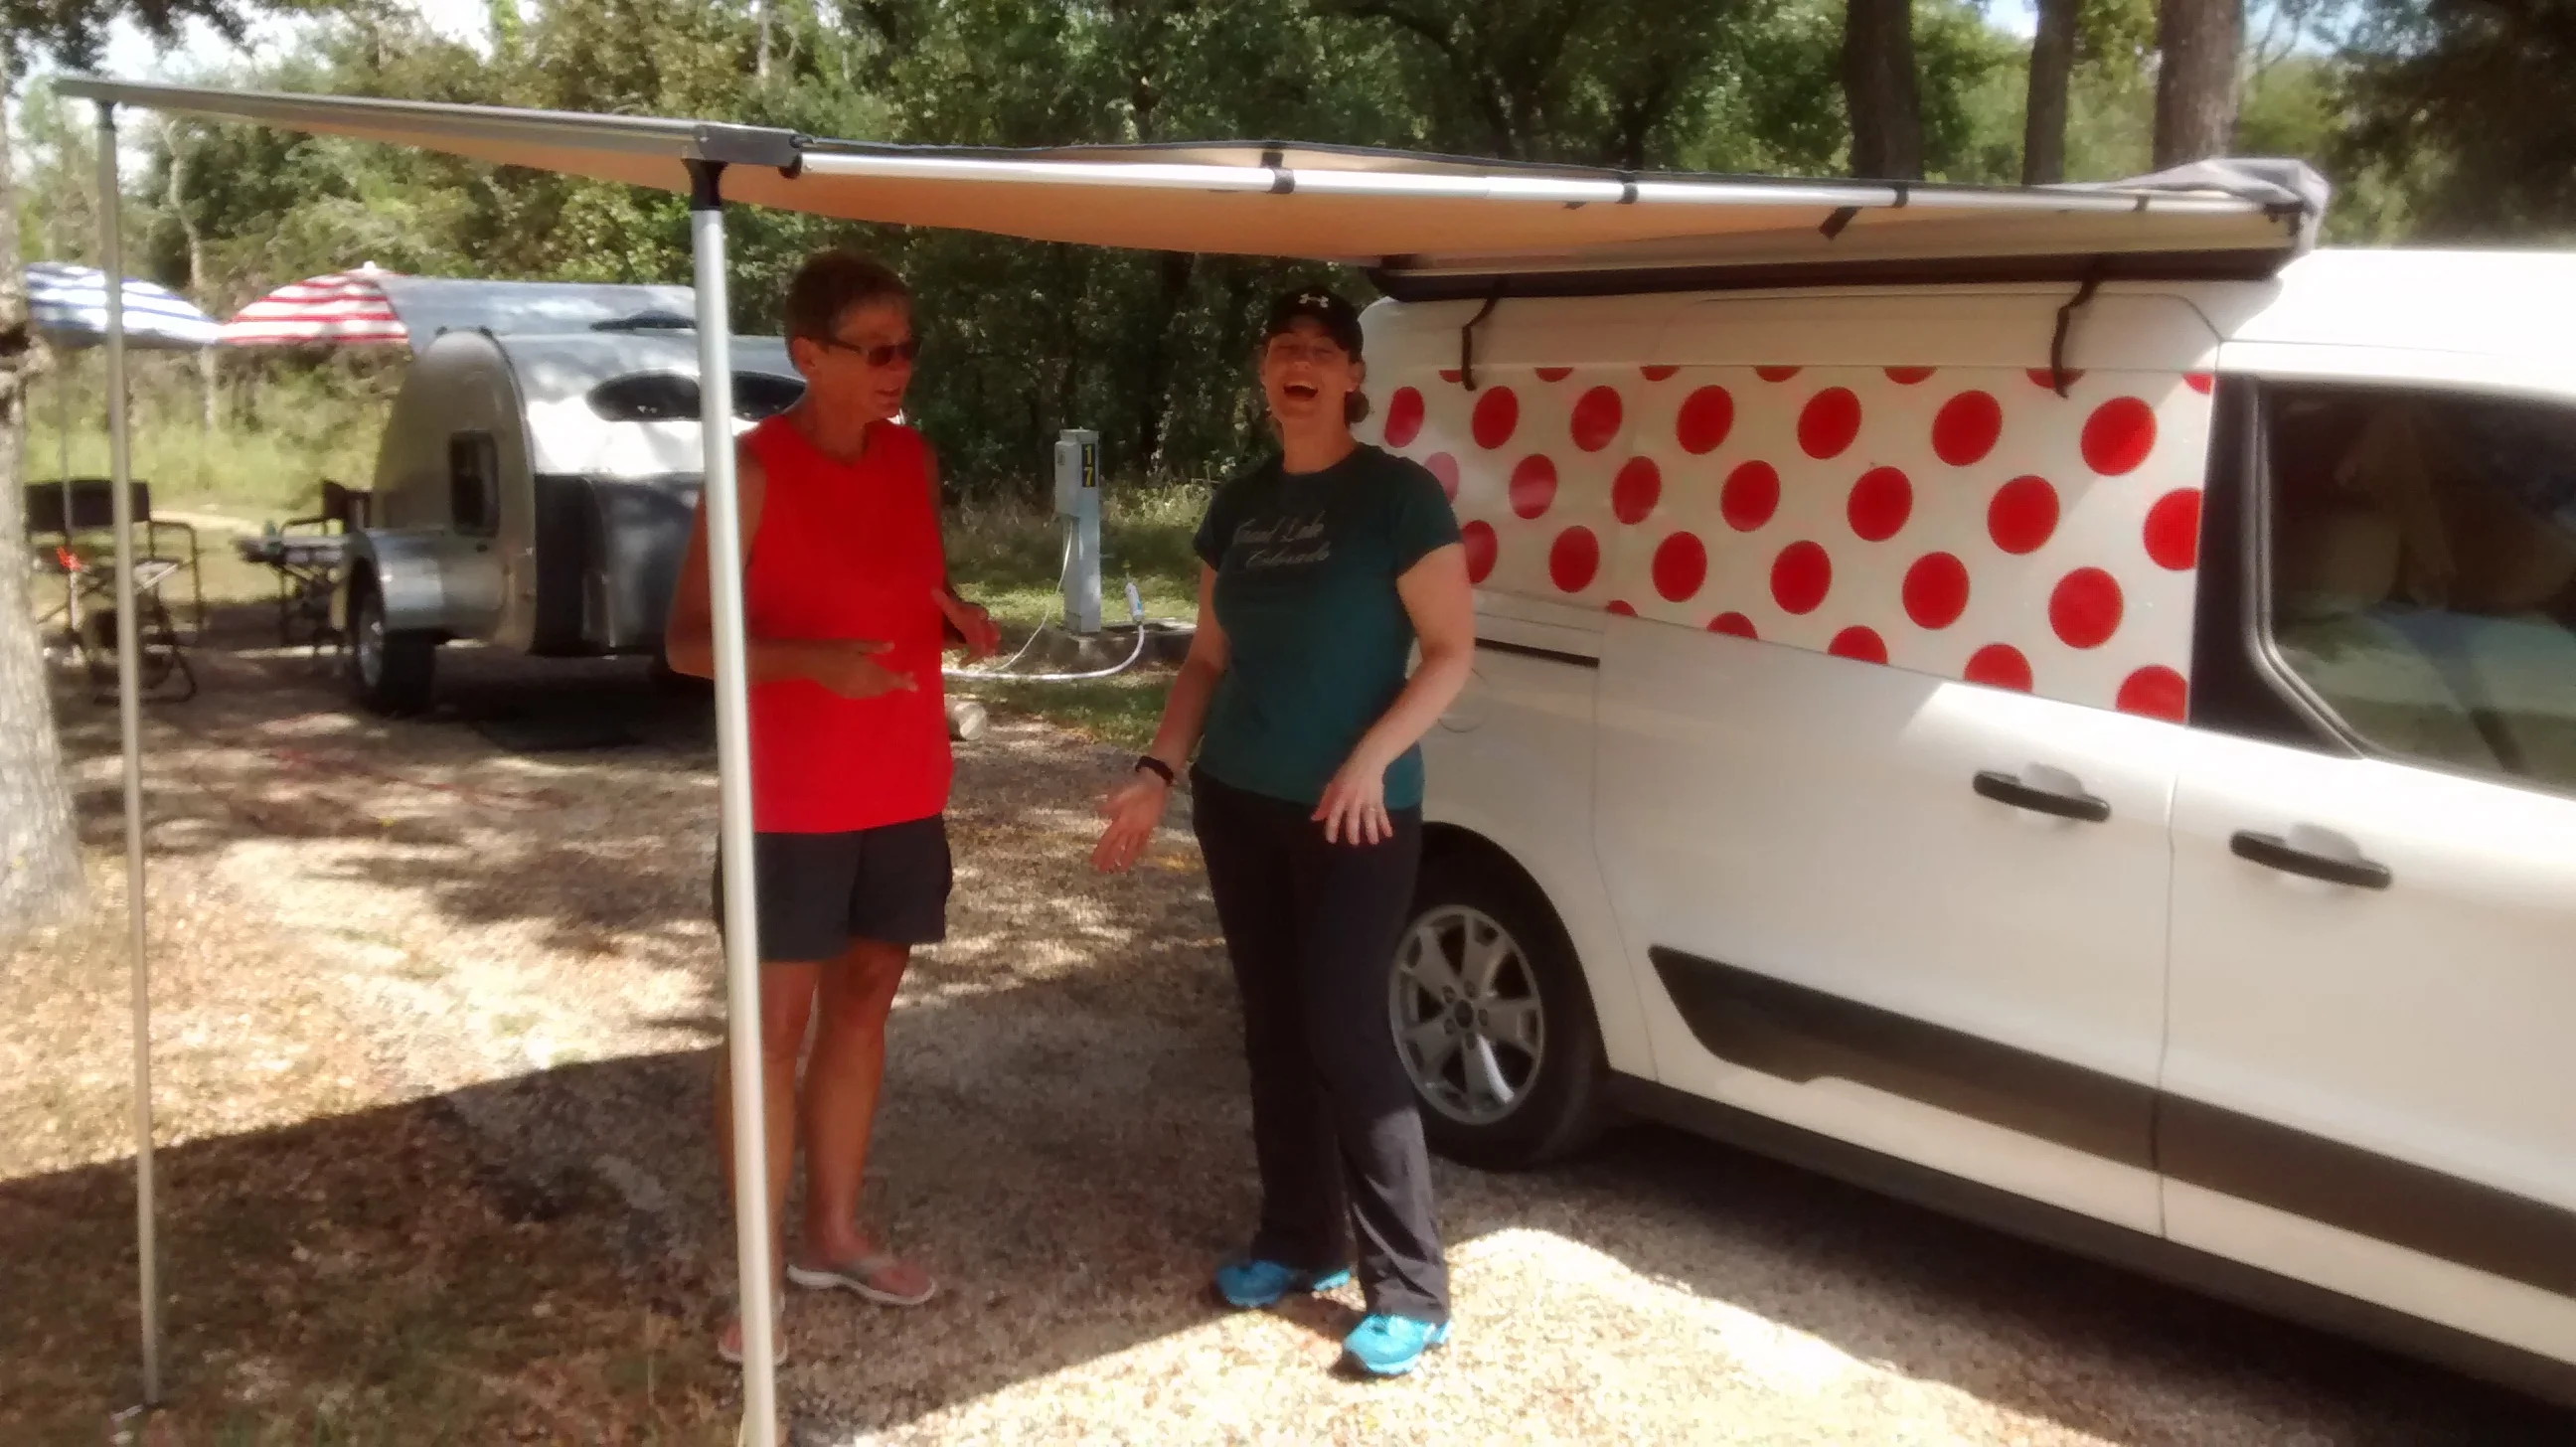
Alea and Paula model the new awning...
It managed to rain that night, so it wasn't until Van Horn, TX that things were dried out for me to finish the install (I also needed a campsite where it was possible to move a picnic table next to the van to facilitate performing this final step). I coated the bare, sanded wood with truck bed liner. (Thanks to Cary at Camp Inn for his suggestions on mounting and sealing the two by two that we used to mount the awning to the van.)
ARB has a $100 option for a wind screen that attaches to either side of the awning, which is pretty much essential, since the sun moves around a lot during the day. (At low sun angles, the awning can be almost worthless without them.) We opted to visit Harbor Freight in El Paso, TX instead, where I purchased a 7.5' x 5.5' silver tarp (the most reflective option that they had) for $3.50, several bungee loop cords and several carabiners. Using the same, for about $25 we fashioned our own wind screen. It can be staked directly to the ground, but by guying it out we get a lot better air flow and more shade. it installs very quickly and requires very little storage space. If we made a few additional mods to the outside edge of the awning, we would also be able to mount the same awning along that edge (there is another $100 option from ARB for a wind shade that fits along that edge). But as yet, we haven't found that to be a necessity.
We mounted some key rings to the ARB's extruded aluminum to make it easy to use carabiners to clip and unclip the factory guy ropes. We attached a carabiner to one end of the tarp, attaching it to the same key ring. At the other end, we looped a bungee cord around the end of the awning top rail, and attached the tarp to it with another carabiner. The top edge of the tarp is attached to the top rail with additional bungee loop cords through the tarp grommets. We guyed one corner of the tarp using some existing paracord and guyline adjusters (https://www.amazon.com/gp/product/B008Y5GO58/ref=oh_aui_detailpage_o08_s00?ie=UTF8&psc=1) that we had on hand, sharing one of the pegs used to stake down the ARB. For the end on the car side, we looped the guy wire around the front wheel of the van, then slid the adjustable end onto a carabiner at the corner of the tarp. We then use the guyline adjuster to set the proper tension. With the tarp in place we can still open the passenger door of the van.
The downside of the ARB awning is that if you need the tow vehicle for a trip to town, the awning needs to be taken down. However, deployment and take down takes about 30 seconds (for the awning itself, and about the same amount of time for the tarp), so that's not a deal killer. On the plus side, it doesn't take up any space inside the tow vehicle, preserving space for other wants and needs, and it can be deployed and taken down by one person (provided you are tall enough to do so without needing assistance). It also provides more shade than a similarly sized free standing shade (which measures size at the base of the structure, not at the maximum width of the shade fabric). The outside height of the awning can be adjusted from around 4+ feet to nearly 8 feet, and the height of the two poles can be set independently so that you can directly where any rain runoff is channeled to. The awning fabric is much more substantial than our old REI Alcove, resulting in less penetration by sunlight, so that it stays cooler under the awning (provided there is adequate airflow).
Since we didn't go with the typical rack basket installation, there isn't nearly as much drag (it creates about a 6"x6" profile vs. about a 10" by 60" profile) on the van. The effect on our gas mileage has been negligible, but would have been significant with the basket option.
We purchased an ARB 2000 awning (2 meters by 2.5 meters, or about 6'6" by 8'), while we were on the road and I naively had my niece accept delivery for it in Dallas and drive it down to Austin for us (I apologized profusely after seeing just how big the package was - this was one time it would have been worth the $5 to pick it up at a UPS Store).

Tight Squeeze! At over 8 feet long, I was barely able to wedge this into the van for the trip back to our campsite...
The standard option for mounting these awnings is to attach it to the side of a rack basket. That would require factory rails, crossbars, probably some towers, the basket and special mounting brackets - for a total cost of probably $700-$1,000. Add in the the nearly $300 we paid for the awning, and that would have meant some very expensive shade!
Our Ford Transit Connect van has a channel for the factory rails, with several plastic caps covering elongated holes for mounting them to the roof. I popped off four of those and cut a two by two to about 6'6" ( I got that in Jackson, MS). The roof slanted at a noticeable angle, so I used a 3/4" chisel while camping at Oil City, LA to attempt to approximate the corresponding angle along the length of the two by two (if I had access to a table saw I could have duplicated the precise angle very easily).
The holes allowed me to attach the two by two to the roof of the van using stainless steel lag bolts. Before doing that, I liberally applied high quality silicone between the roof and the two by two. I purchased a one foot section of T6 1/4" structural aluminum angle bracket on Amazon.com, cutting it in two pieces to create two very sturdy mounting brackets. I secured these to the two by two with additional lag bolts, attaching them with locking washers and a dash of silicone adhesive (just in case there was any shrinkage of the wood that might cause them to loosen over time).
Once I had the awning in hand in Austin, TX, I drilled the top holes in the angle brackets for mounting the topmost awning bolts (I needed to be certain of the bolt diameter before doing so). With the help of Alea and my neice Paula to hold the awning temporarily in place, I marked the location of the bottom holes. We unmounted the awning, drilled the additional holes and installed the awning. Yee-Haw! It worked. Awesome!
Alea and Paula model the new awning...
It managed to rain that night, so it wasn't until Van Horn, TX that things were dried out for me to finish the install (I also needed a campsite where it was possible to move a picnic table next to the van to facilitate performing this final step). I coated the bare, sanded wood with truck bed liner. (Thanks to Cary at Camp Inn for his suggestions on mounting and sealing the two by two that we used to mount the awning to the van.)
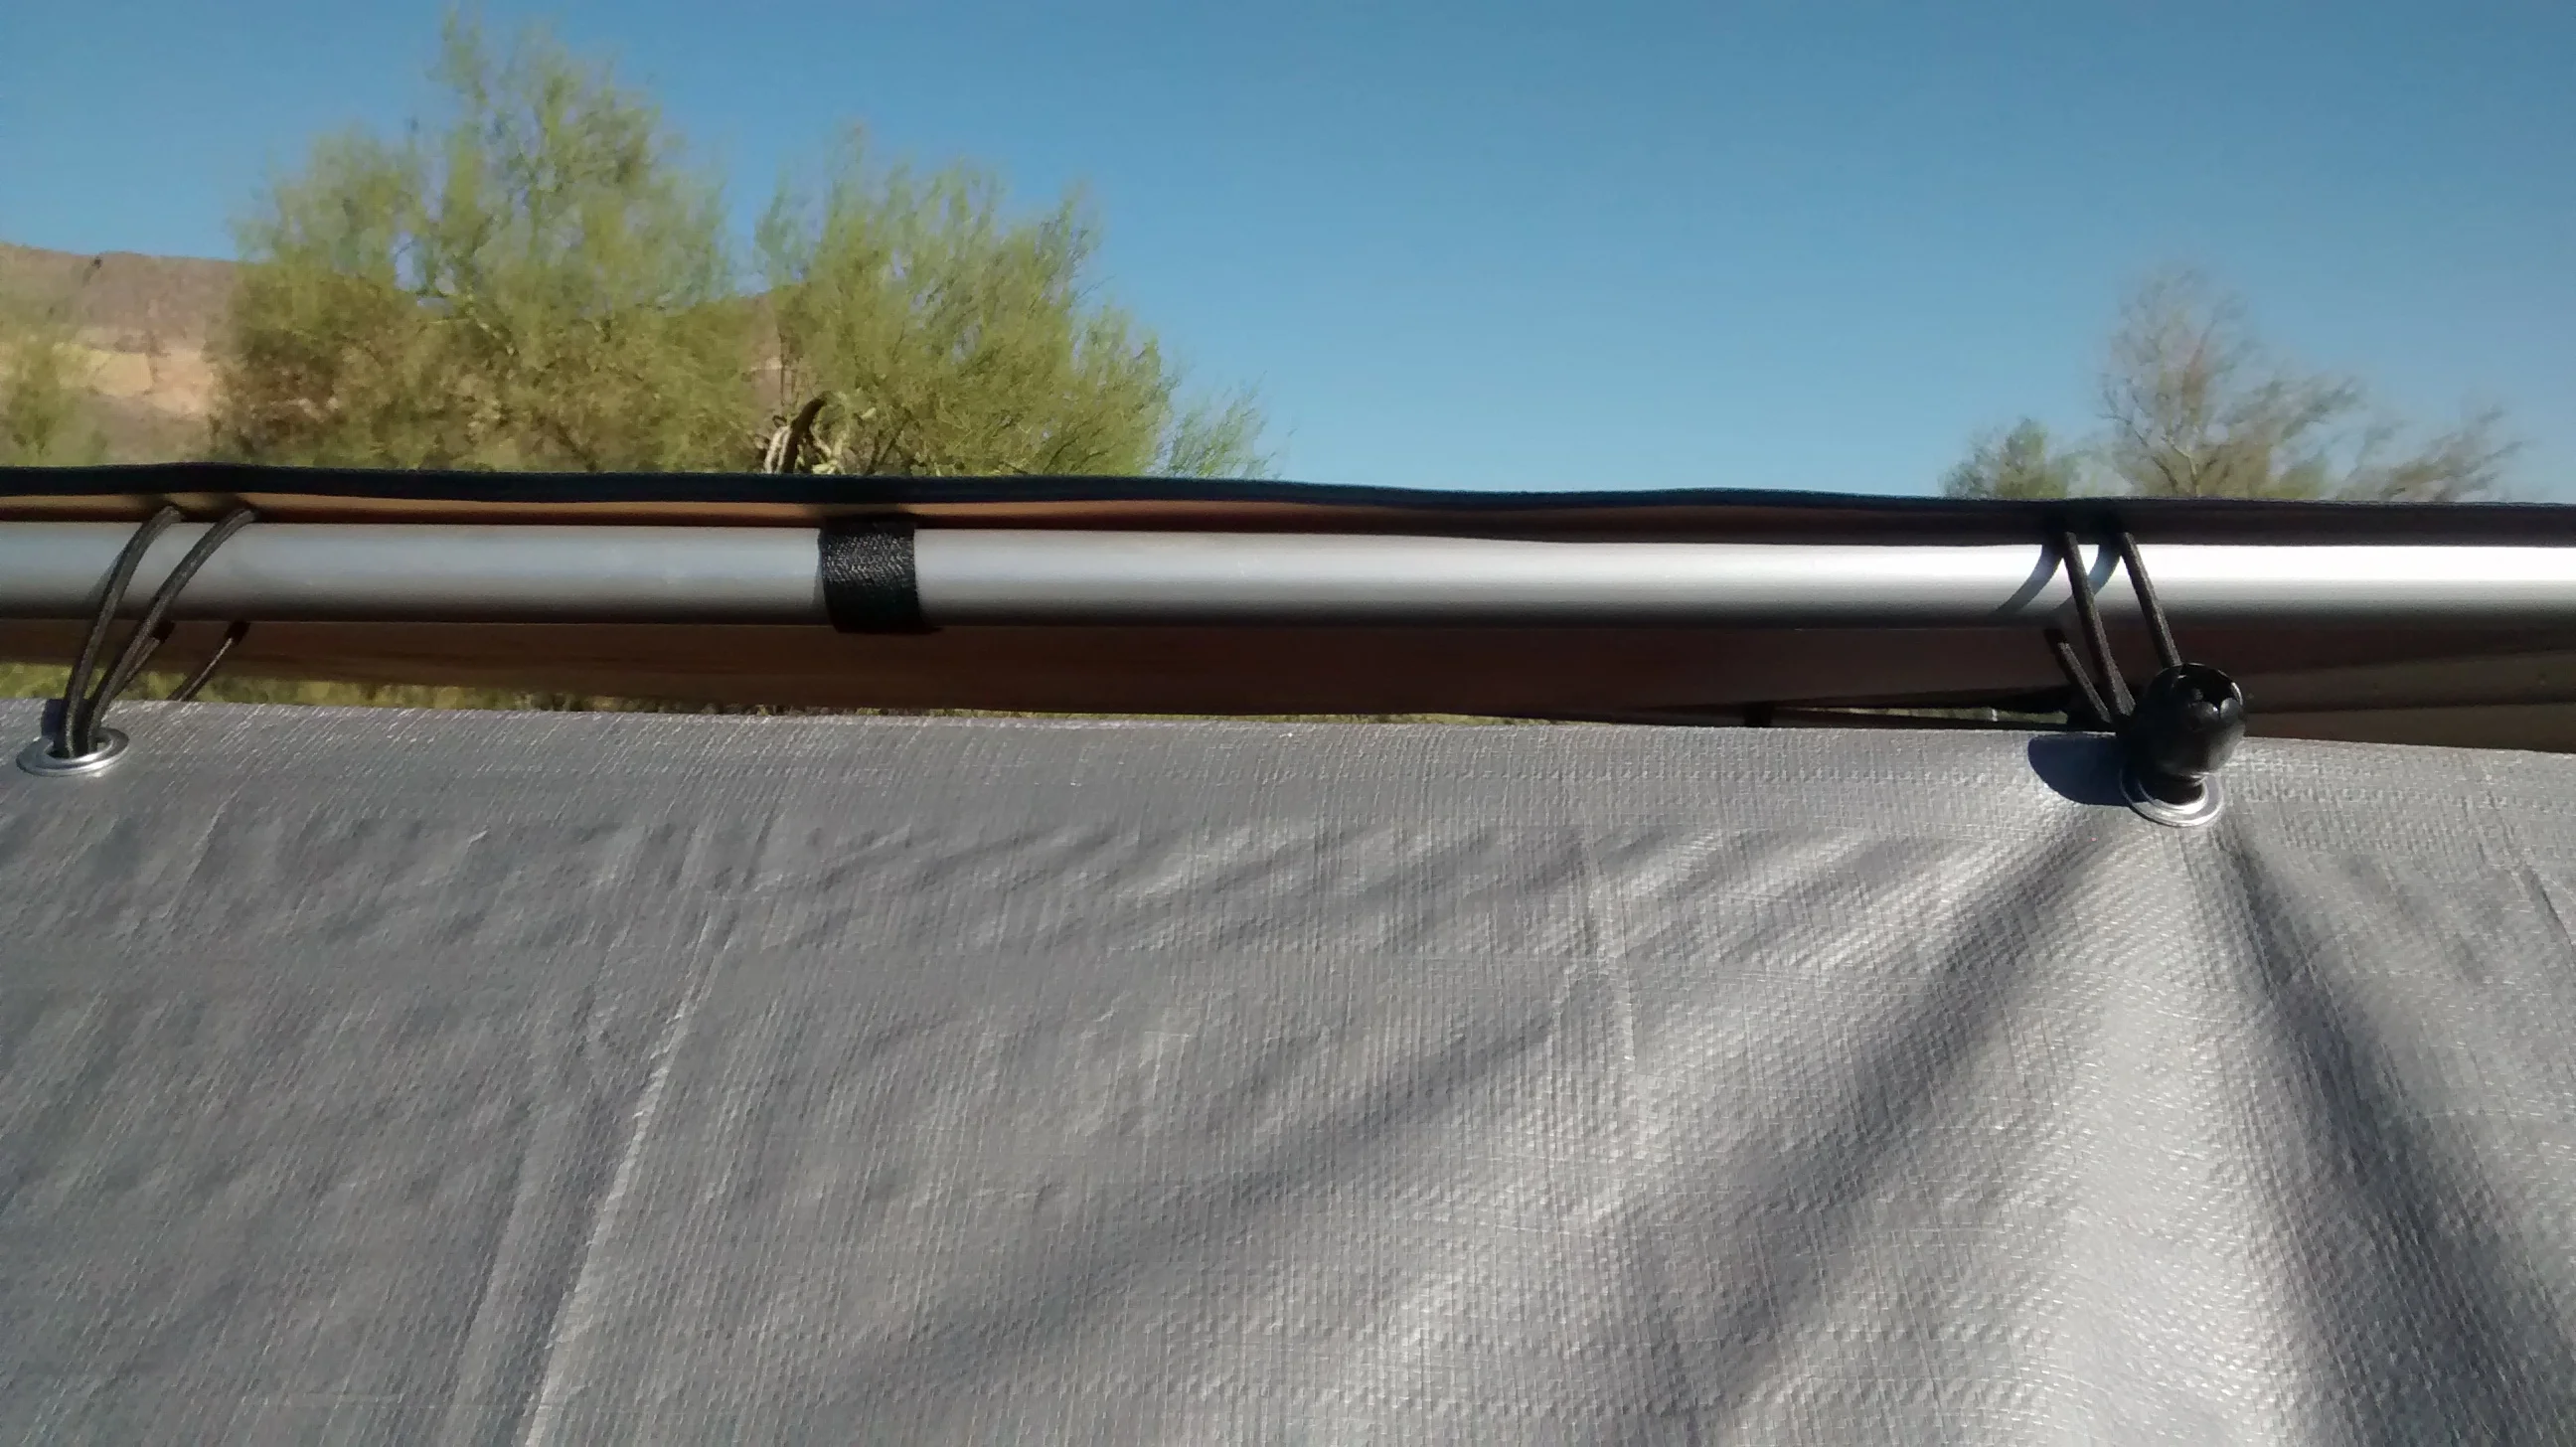
ARB has a $100 option for a wind screen that attaches to either side of the awning, which is pretty much essential, since the sun moves around a lot during the day. (At low sun angles, the awning can be almost worthless without them.) We opted to visit Harbor Freight in El Paso, TX instead, where I purchased a 7.5' x 5.5' silver tarp (the most reflective option that they had) for $3.50, several bungee loop cords and several carabiners. Using the same, for about $25 we fashioned our own wind screen. It can be staked directly to the ground, but by guying it out we get a lot better air flow and more shade. it installs very quickly and requires very little storage space. If we made a few additional mods to the outside edge of the awning, we would also be able to mount the same awning along that edge (there is another $100 option from ARB for a wind shade that fits along that edge). But as yet, we haven't found that to be a necessity.
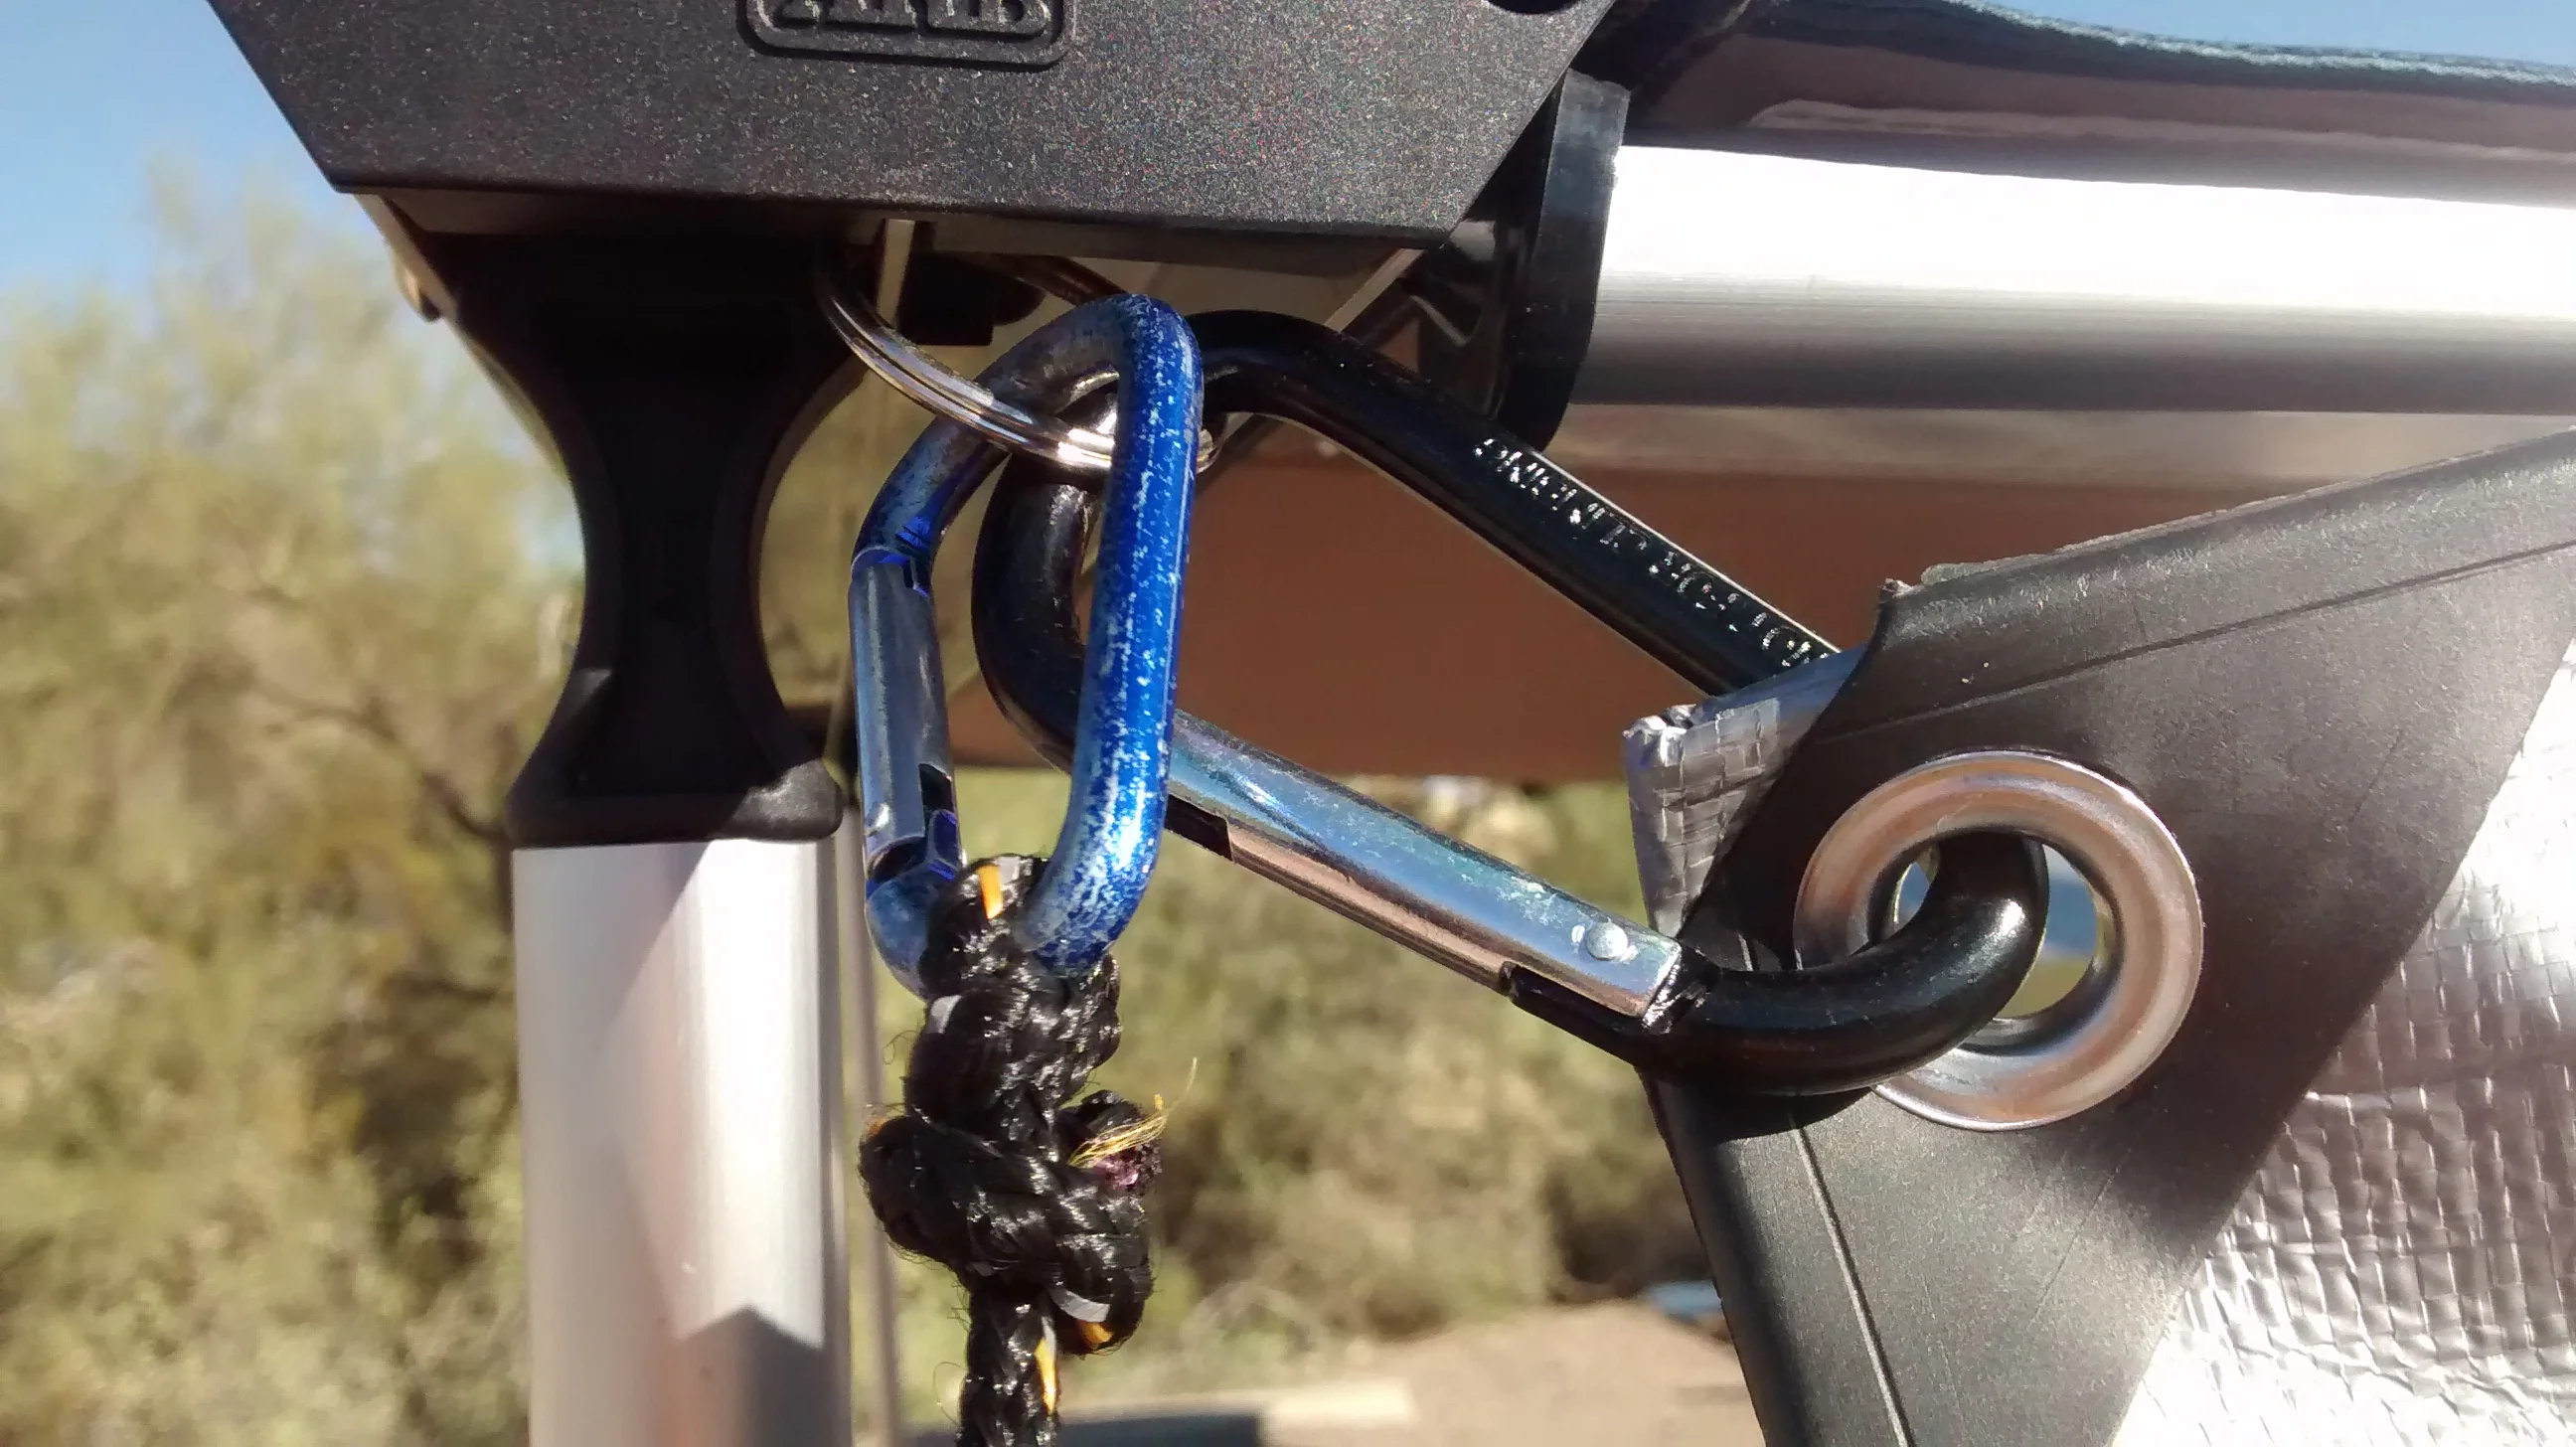
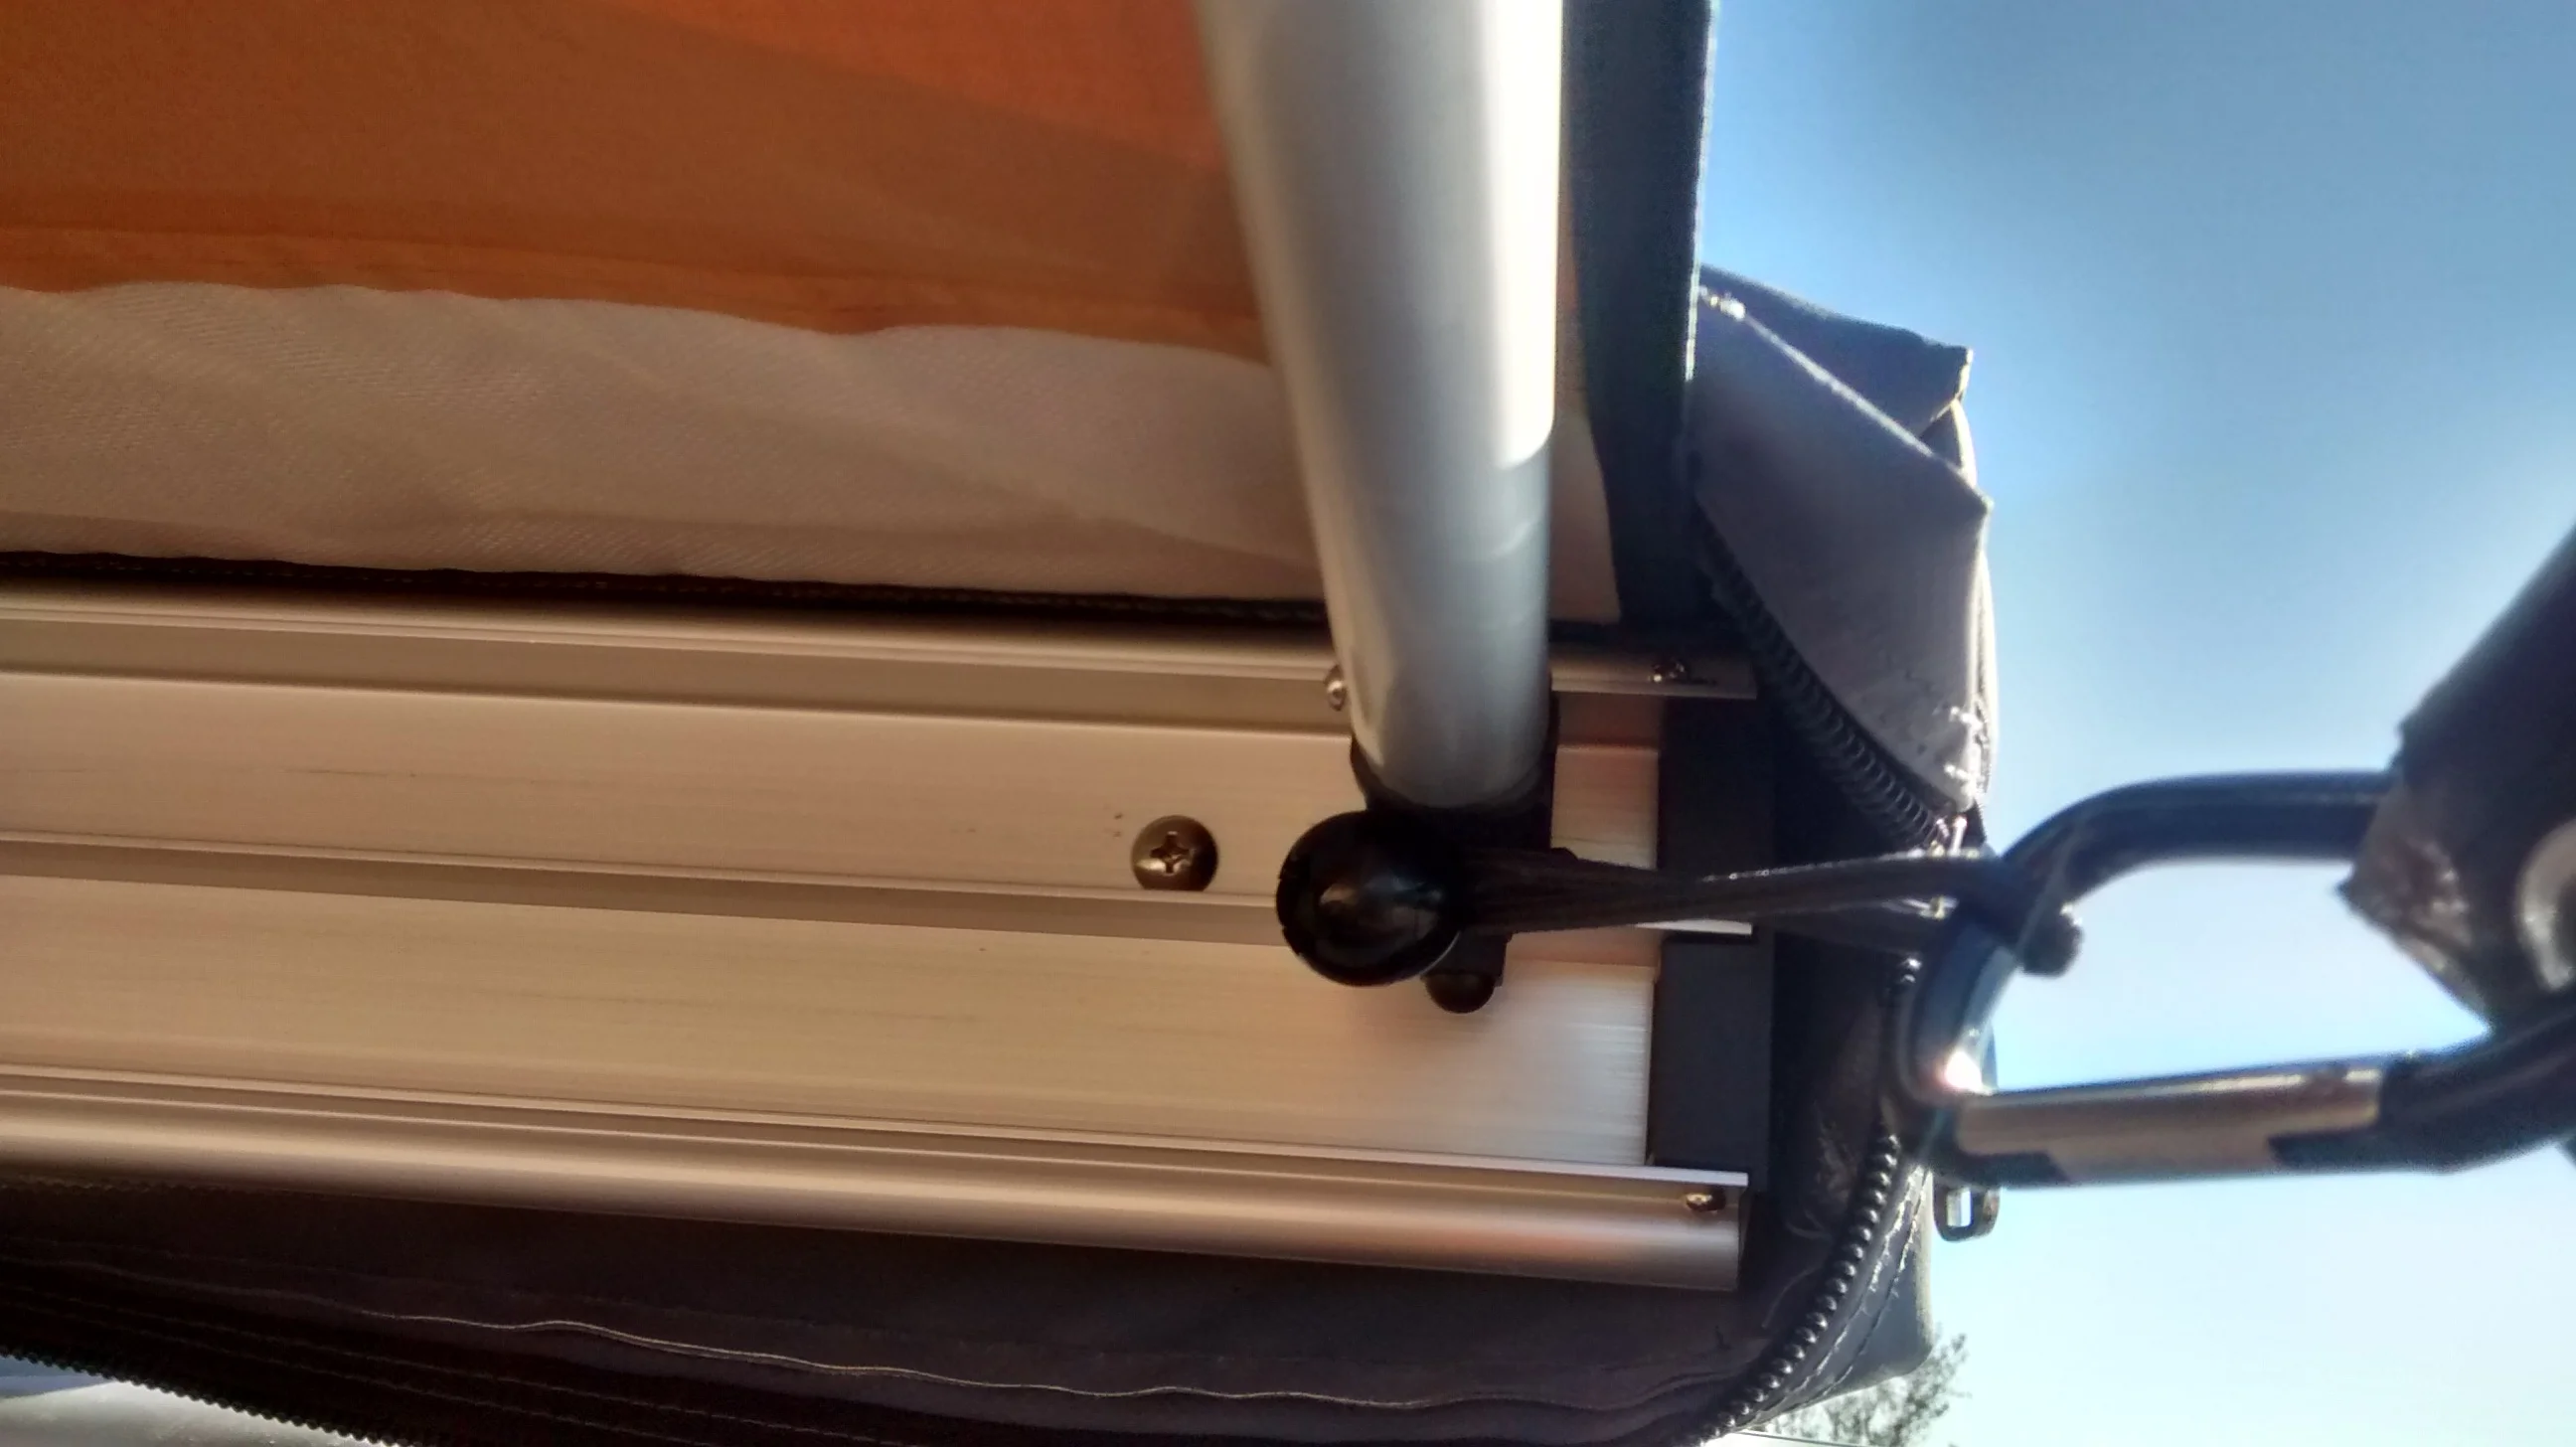
We mounted some key rings to the ARB's extruded aluminum to make it easy to use carabiners to clip and unclip the factory guy ropes. We attached a carabiner to one end of the tarp, attaching it to the same key ring. At the other end, we looped a bungee cord around the end of the awning top rail, and attached the tarp to it with another carabiner. The top edge of the tarp is attached to the top rail with additional bungee loop cords through the tarp grommets. We guyed one corner of the tarp using some existing paracord and guyline adjusters (https://www.amazon.com/gp/product/B008Y5GO58/ref=oh_aui_detailpage_o08_s00?ie=UTF8&psc=1) that we had on hand, sharing one of the pegs used to stake down the ARB. For the end on the car side, we looped the guy wire around the front wheel of the van, then slid the adjustable end onto a carabiner at the corner of the tarp. We then use the guyline adjuster to set the proper tension. With the tarp in place we can still open the passenger door of the van.
The downside of the ARB awning is that if you need the tow vehicle for a trip to town, the awning needs to be taken down. However, deployment and take down takes about 30 seconds (for the awning itself, and about the same amount of time for the tarp), so that's not a deal killer. On the plus side, it doesn't take up any space inside the tow vehicle, preserving space for other wants and needs, and it can be deployed and taken down by one person (provided you are tall enough to do so without needing assistance). It also provides more shade than a similarly sized free standing shade (which measures size at the base of the structure, not at the maximum width of the shade fabric). The outside height of the awning can be adjusted from around 4+ feet to nearly 8 feet, and the height of the two poles can be set independently so that you can directly where any rain runoff is channeled to. The awning fabric is much more substantial than our old REI Alcove, resulting in less penetration by sunlight, so that it stays cooler under the awning (provided there is adequate airflow).
Since we didn't go with the typical rack basket installation, there isn't nearly as much drag (it creates about a 6"x6" profile vs. about a 10" by 60" profile) on the van. The effect on our gas mileage has been negligible, but would have been significant with the basket option.