Hi all-
Mick wrote Evan an email and thought I should post it here. I am adding the photos in a minute, so if you don't see them, they are coming. I just didn't want to lose this info switching back and forth between screens.
Sarah
------------------------------
Hi Evan,
Sarah mentioned you ran your battery flat on the teardrop recently. I did the modification we talked about and added a couple of extra batteries. Below is a little write up of what I did, if you think it will help others then feel free to post it to the forum.
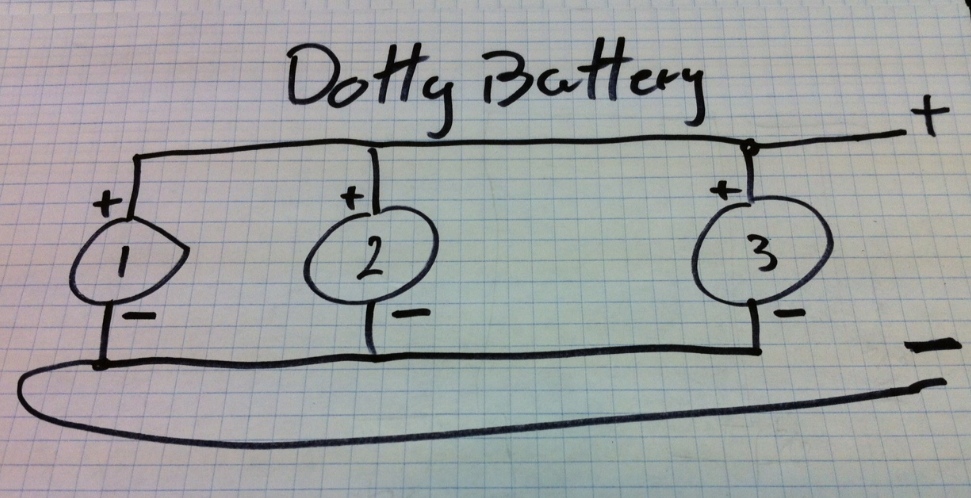
First, a little battery 101, I am not an expert but it’s handy to know the basics. When linking batteries in parallel you need to make sure all the batteries are of the same type and size and all of the same age. As you correctly stated when you link batteries, you are making a bigger battery (each 12v batteries are made up of six 2v cells in series) and a weak link will bear the burden of the current sink and be the first to fail. When you link batteries in parallel the best way to connect them is to have equal length wire running from each negative and positive terminal to a common point ensuring that the resistance of the wires is matched. Matching resistance means matched current draw from each battery. Of course it's not always possible to do based on battery locale, true in our setup. My goal was to triple the capacity of the system by adding two batteries in that space between the boxes and the axle. The third battery stays in the stock location. When you hook up batteries that will have unequal lengths of wire from terminal to terminal, it's important to take the positive source from one end of the chain and the negative from the other. While this setup is not perfect it balances the current draw a little. Below is a diagram of the battery connections.
I’m sure someone won’t believe this makes a difference because they have done it in the past and it worked, so for those people read this:
http://www.smartgauge.co.uk/batt_con.html
The single battery went flat in about two days with the fridge running so with three batteries in parallel we *might* get 6 days of use. The battery which came with our Camp Inn was the EnerSys Genesis NP33 (33 AH) deep cycle battery. (Amazon $64 each + shipping search for Genesis NP33-12B) It’s a sealed lead acid deep cycle battery which is actually a good fit for this application as you can drain it dead and have some chance of it not being damaged. Typically you should not drain a battery down lower than 20%. The other advantage is that it’s a small battery and based on measurements I was going to be able to build a box to store them, and it would fit in the space between the axle and water tanks.
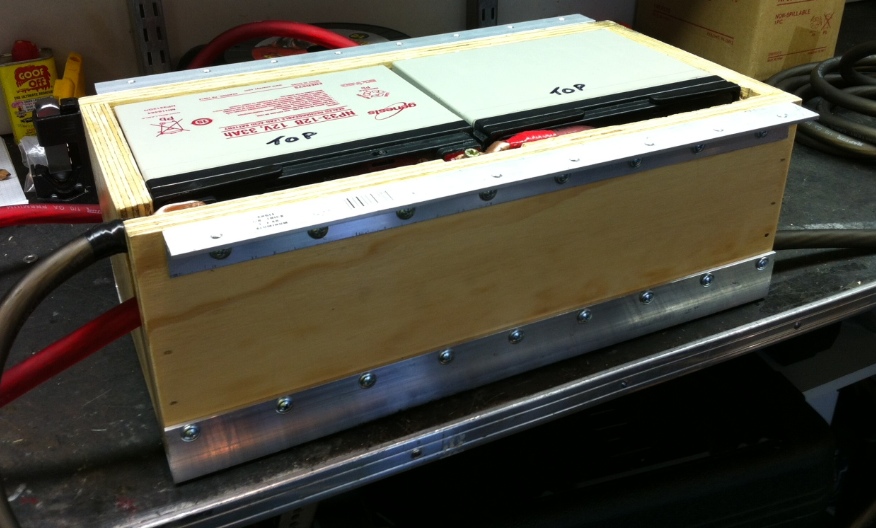
Here is a picture of the box I made
As with everything I build, its overkill. I was worried that with 60lbs of battery hanging from the trailer that I would want to secure it very well which is why the angled metal is along the long side of the box. If I was to do it again I would increase the size of the box making it easier to route the wires and have the brackets at the end. I used wood screws but if I did brackets at the end I would have used a couple of small bolts countersunk into the floor under the mattress. My box worked fine and fit like a glove but it would have been nice to have a little more room in the box to pad the batteries. The wires come out at the top on one side and the bottom on the other. This was so that if the batteries vented, yes even sealed batteries can vent, the gas could escape via the top hole. Also the batteries are raised on little ¼" feet so that if water got in they are not sitting in it and the water can drain out the bottom hole.
Also, see the size of the wire I used, that’s automotive 0/1 gauge wire, huge ($40 for 25 feet). The larger the core of the wire the less resistance and with the two batteries a little distance from the third I wanted to minimize any voltage drop between them. Again overkill, I would recommend 4 gauge if you are doing the same but nothing smaller.
The box is made from ¾" cabinet grade, external glue plywood with 4 coats of marine grade finish on it. Screwed with brackets made from aluminum angle.
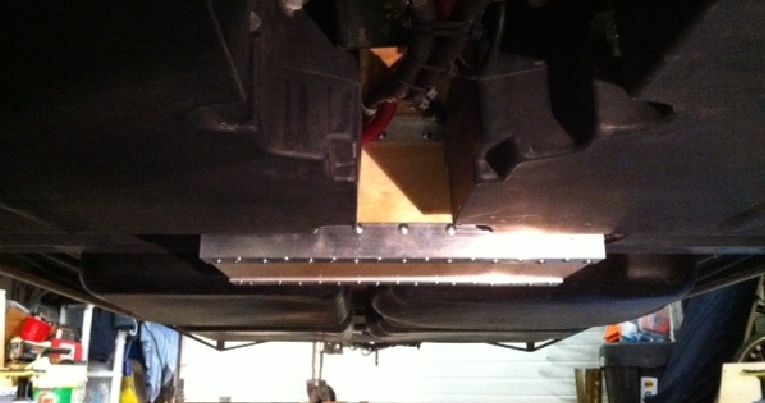
The box attaches to the bottom of the trailer and only sticks down lower than anything else by about 1”, hence the metal edges.
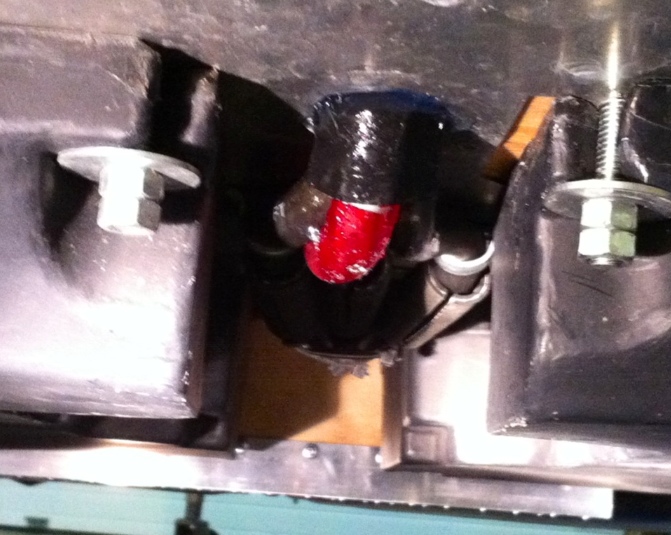
Ok, now for the tough bit, I have three 0/1 gauge wires to run into the trailer (this is where 4 gauge would have been so much easier to work with). As we do not have the hitch mount on the rear I just decided to run it in right there in the middle. No need to pull the tanks out of the way (but I did remove them for the install). I just drilled a hole up into the trailer which goes into the sink side area. This will be a problem for people with the hitch. You *may* be able to get 4 gauge wires in next to the hitch, I’m not sure what the hitch mount looks like inside.
Here you can see the wires running inside. Rubber gasket and extra sealer just in case.
Inside the trailer these poke in on the side with the sink, as I said. The floor of that side is already raised so the wires are hidden and you then run them into the other side through a hole.
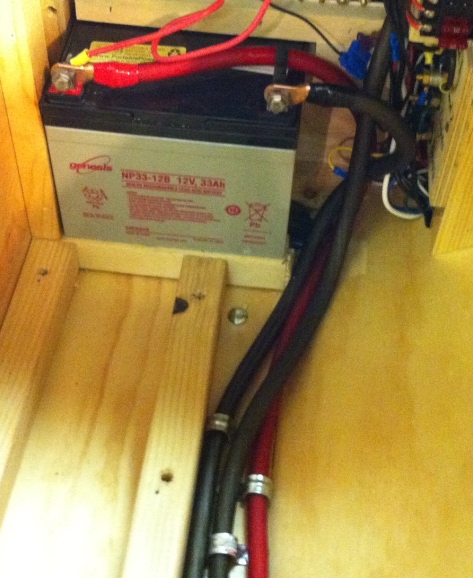
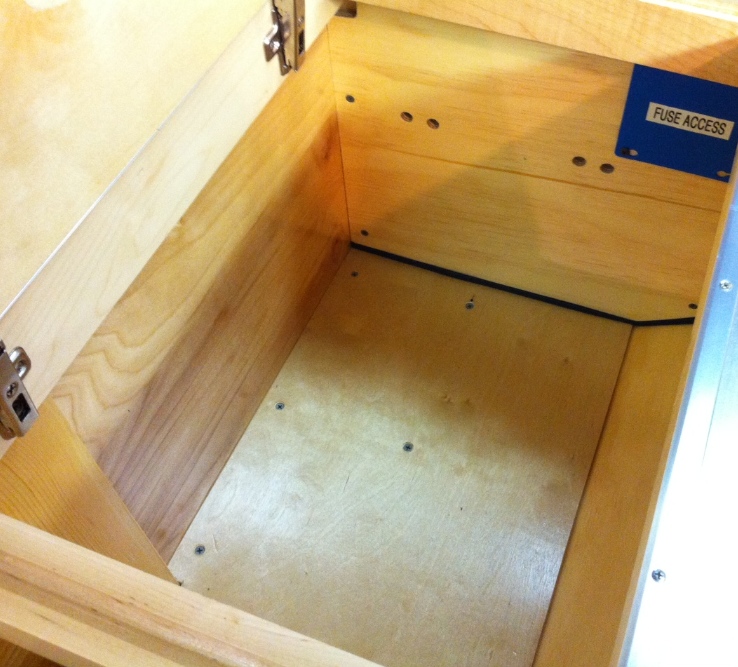
The other side I built a raised floor so I could run the wires over to the electrical area. See picture below, you can see the 2x2 which raise the floor. It’s only a small loss of space. Remember the battery below in the stock space is also a new one so it’s matched with the other two. The battery I took out was still good, so I used it to replace the battery in one of my race cars which always needed to be jump started (waste not want not, as they say).
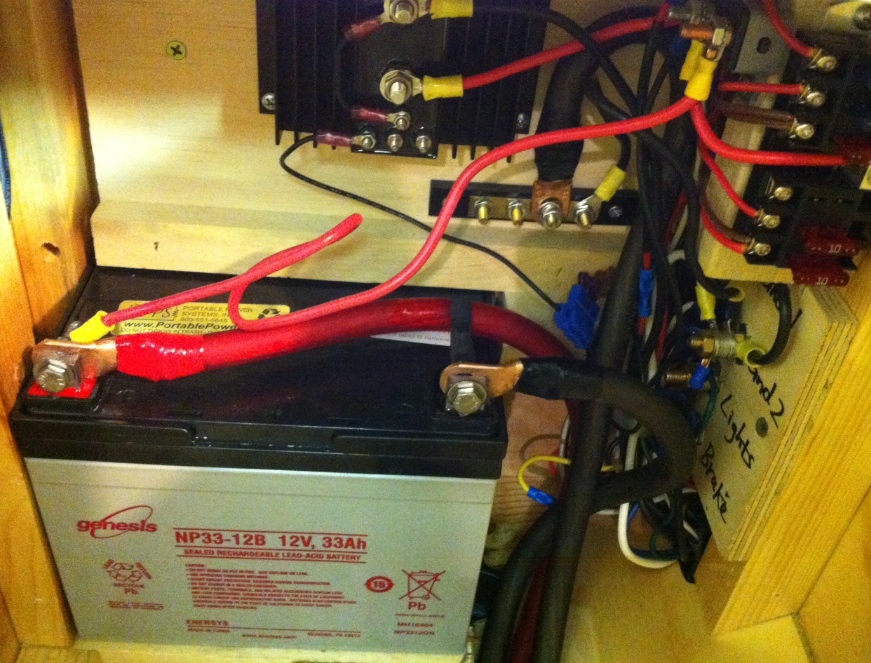
Once the wires are inside of the electrical area it’s just a case of hooking them up the right way. Note that I have three wires as I am taking the negative off from the other end of the battery set.
I added a negative bus bar on the side so you can hook the negative wire to the trailers negative. Remember which wire is from which end of the battery set. Note the positive goes straight to the battery in my case, and the trailer source hooks directly to it. Also note no fuses. With batteries in parallel if you want to be perfect you would put a fuse between each battery and then a cut-off switch. The trailer has a fuse so it’s protected and if the batteries fail then a fuse between them is not going to do that much, IMO, so I didn’t bother. But at this point you are basically done.
Finally, the side panel with fuse panel needed a little modification due to the now false floor. It’s got a little rubber gasket on the bottom just so it seals better and crumbs don’t get in. The false floor is ½" cabinet grade ply with again the 4 coats of finish. It’s not a perfect fit but does the job.
Our trailer has the built in 5amp trickle charger so you can work out how long the battery bank will take to charge up if drained to zero. (About 20 hours in theory but have yet to drain the batteries that much so not sure yet.) They will also charge as normal by the car but again take much longer to get to full.
Anyway that’s how I did it, I am sure it can be improved upon. You could just stick a 100Ah deep cycle battery in the storage area and call it done but it will take up so much space. I liked the idea of using that gap between the axle and the tanks.
Feel free to ask questions. I’m sure I left some details out.
Cheers
Mick
")