I had heard of others making some fabric to cover the roof vent for room darkening (if not using the fan) and decided to do a little diy project; since I recently needed upholstery fabric for a different (in house) project and had some left over pieces. And then I also thought... what I also need is a little bit of "air management" for the few times I use the air conditioner, to have the cold air circulate a bit better. So here's my project...
Materials list:
- 20" x 21.5" room-darkening or upholstery fabric (will end up with a finished size of 19" x 20.5", presuming a 1/2" seam) -- note this is for MY camper, a 550. Your camper might need more or less material--measure yourself to determine your size needed.
- 3m Command Picture Hanging Strips (because they are white, so a little less noticable, and removable from the air conditioner, and stronger than just 'normal' velcro)
- Velcro (I happened to have some black strips around)
- 3m hooks, small (velcro might have worked just fine here, but I had 3m hooks, so I used those)
- grommet kit (2 grommets needed if using 3m hooks, if not, just use velcro)
- Sewing machine needed to assemble.
Finish all 4 edges of the fabric, so you end up with approx 19" by 20.5" piece of material. The 19" will be the side against air conditioner, and the 20.5" will be what covers the fan. measure yourself, of course!
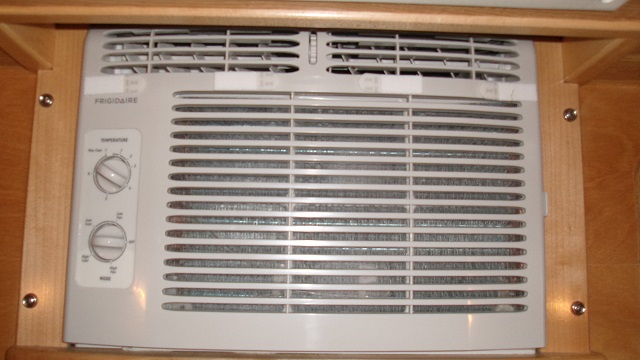
Dry fit the material to the air conditioner; this might be the hardest part to "visualize" at first. Remember you want the attach point to be below where the cold air comes out, and above the air return/air filter section. Since you want to be looking at the pretty side when it's against the ceiling, the top 1/2" or so will be folded back.
Backside of finished material
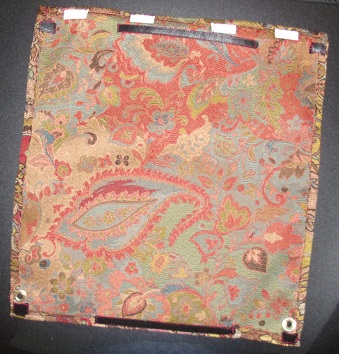
See here where you only see the black velcro, compared to where the picture hanger pieces are on the back side when it's not attached? (above)
Hanging from the picture hanger connections only
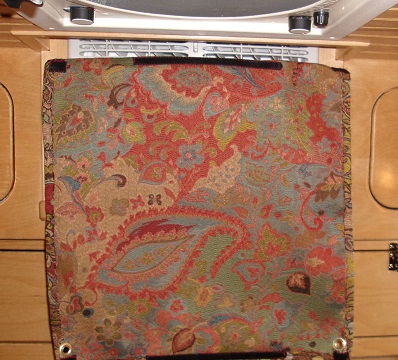
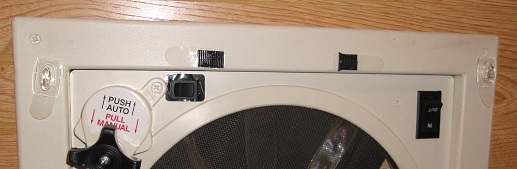
Figure out approximately where you want the picture hanger pieces to be on the material; and sew those on. As close to the top edge as possible, but you don't want to see them from the pretty side of the material.
Attach the 3m picture hanger mates to the air conditioner, carefully matching up where you sewed those sections on the material.
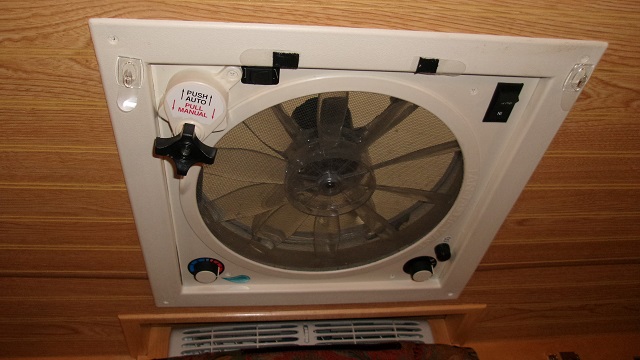
I wasn't sure if velcro alone would have been strong enough to support the material when it's in "room darkening" or "air conditioner" mode, so I ended up using 3m hooks and a couple of grommets. I put in a couple of grommets first, leaving room above (below, depending how you are looking at the material) to allow for some additional velcro. After placing the grommets, then I attached small 3m clear plastic hooks to the best locations on the fan (see picture). Note for the "air conditioner mode", what you want is the bowed down look; you don't want the material to be tight to the roof line at the head; tighter on the edges/door sides is correct, but for air management you want the air to be directed from the blower to the head of the bed.
To finish it off and for prettiness when not in use, sewed some 'normal' velcro top and bottom (on the reverse side) so that there can be a "just look pretty" position, and also so that if I'm in "room darkening" mode, I glued some velcro to some spare 3m hook pieces, and then attached those to the fan (so I can always remove them and replace if I want to). For example, I may decide the 3m hooks on the fan was a ridiculous idea, and if so, I can remove those and just put up velcro instead.
End result: All materials used that attach to the air conditioner, or the fan, are those 3m things that can be removed with the pull tab, so repositioning (or discarding) is possible. And now I have a 3-uses thing:
1) just hang there and look pretty, covering up (most of) the air conditioner.
2) air conditioner mode, to help circulate cold air a little better for the twice a year I use that.
3) room darkening mode, if I'm not using the fan at all. The fan cover might be open, but not actively in use.
And of course, it's just attached with Velcro-like stuff--I can completely remove it and store it.
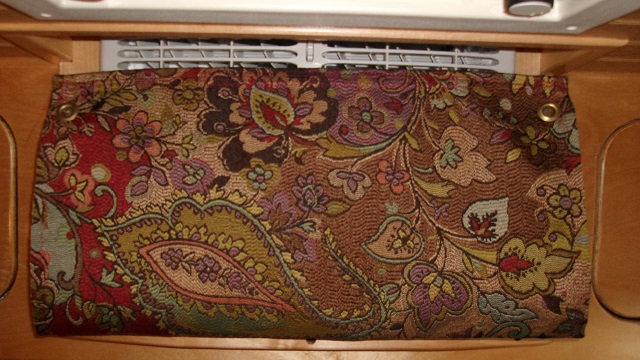
Just hang there and look pretty position
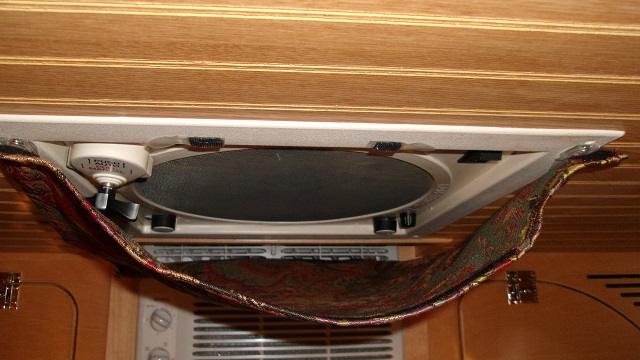
Air Conditioner Mode
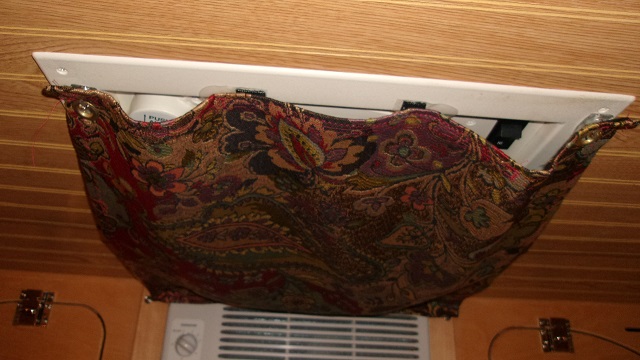
Room Darkening Mode
Materials list:
- 20" x 21.5" room-darkening or upholstery fabric (will end up with a finished size of 19" x 20.5", presuming a 1/2" seam) -- note this is for MY camper, a 550. Your camper might need more or less material--measure yourself to determine your size needed.
- 3m Command Picture Hanging Strips (because they are white, so a little less noticable, and removable from the air conditioner, and stronger than just 'normal' velcro)
- Velcro (I happened to have some black strips around)
- 3m hooks, small (velcro might have worked just fine here, but I had 3m hooks, so I used those)
- grommet kit (2 grommets needed if using 3m hooks, if not, just use velcro)
- Sewing machine needed to assemble.
Finish all 4 edges of the fabric, so you end up with approx 19" by 20.5" piece of material. The 19" will be the side against air conditioner, and the 20.5" will be what covers the fan. measure yourself, of course!
Dry fit the material to the air conditioner; this might be the hardest part to "visualize" at first. Remember you want the attach point to be below where the cold air comes out, and above the air return/air filter section. Since you want to be looking at the pretty side when it's against the ceiling, the top 1/2" or so will be folded back.
Backside of finished material
See here where you only see the black velcro, compared to where the picture hanger pieces are on the back side when it's not attached? (above)
Hanging from the picture hanger connections only
Figure out approximately where you want the picture hanger pieces to be on the material; and sew those on. As close to the top edge as possible, but you don't want to see them from the pretty side of the material.
Attach the 3m picture hanger mates to the air conditioner, carefully matching up where you sewed those sections on the material.
I wasn't sure if velcro alone would have been strong enough to support the material when it's in "room darkening" or "air conditioner" mode, so I ended up using 3m hooks and a couple of grommets. I put in a couple of grommets first, leaving room above (below, depending how you are looking at the material) to allow for some additional velcro. After placing the grommets, then I attached small 3m clear plastic hooks to the best locations on the fan (see picture). Note for the "air conditioner mode", what you want is the bowed down look; you don't want the material to be tight to the roof line at the head; tighter on the edges/door sides is correct, but for air management you want the air to be directed from the blower to the head of the bed.
To finish it off and for prettiness when not in use, sewed some 'normal' velcro top and bottom (on the reverse side) so that there can be a "just look pretty" position, and also so that if I'm in "room darkening" mode, I glued some velcro to some spare 3m hook pieces, and then attached those to the fan (so I can always remove them and replace if I want to). For example, I may decide the 3m hooks on the fan was a ridiculous idea, and if so, I can remove those and just put up velcro instead.
End result: All materials used that attach to the air conditioner, or the fan, are those 3m things that can be removed with the pull tab, so repositioning (or discarding) is possible. And now I have a 3-uses thing:
1) just hang there and look pretty, covering up (most of) the air conditioner.
2) air conditioner mode, to help circulate cold air a little better for the twice a year I use that.
3) room darkening mode, if I'm not using the fan at all. The fan cover might be open, but not actively in use.
And of course, it's just attached with Velcro-like stuff--I can completely remove it and store it.
Just hang there and look pretty position
Air Conditioner Mode
Room Darkening Mode
") I did use the a/c on a hot and humid weekend, with the material redirecting airflow. I do have a temp gauge for indoor and outdoor temp, and the internal temp did drop quickly. Would it have been any better without the material, I couldn't say. It was nice to have the cool air directed toward my head, if only for the cool breeze.
I did use the a/c on a hot and humid weekend, with the material redirecting airflow. I do have a temp gauge for indoor and outdoor temp, and the internal temp did drop quickly. Would it have been any better without the material, I couldn't say. It was nice to have the cool air directed toward my head, if only for the cool breeze.