Fridge Handle idea!

Mick'nSarah

Junior Ranger
Hi all!

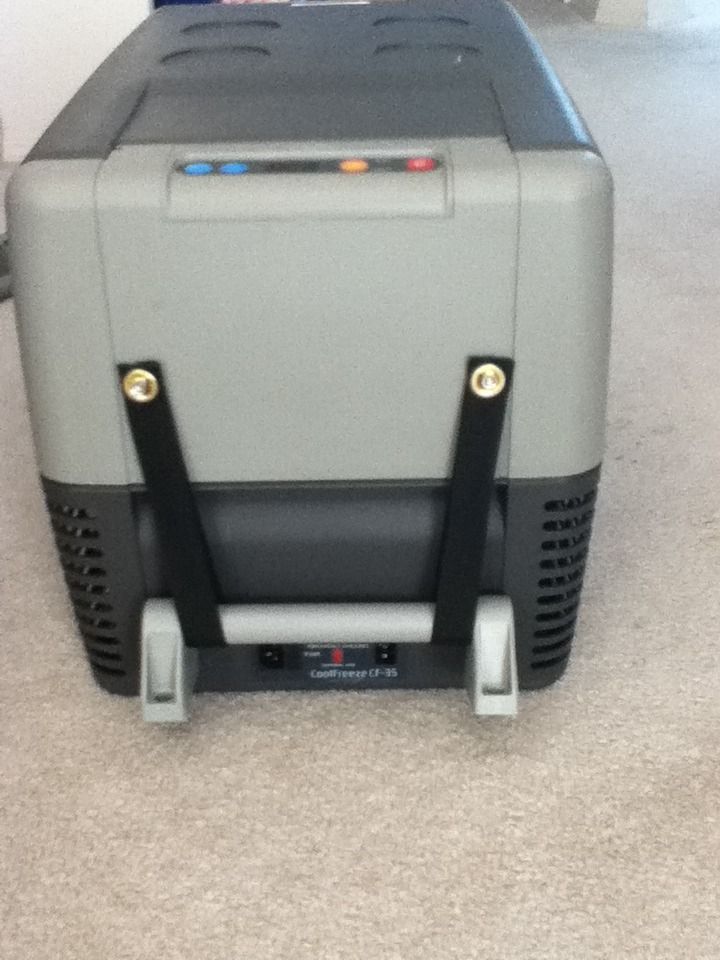
I have been working on a little project today, and thought I would share what I did. I may be late to the party on this (wouldn't be the first time!), but I hadn't seen anything from anyone else.

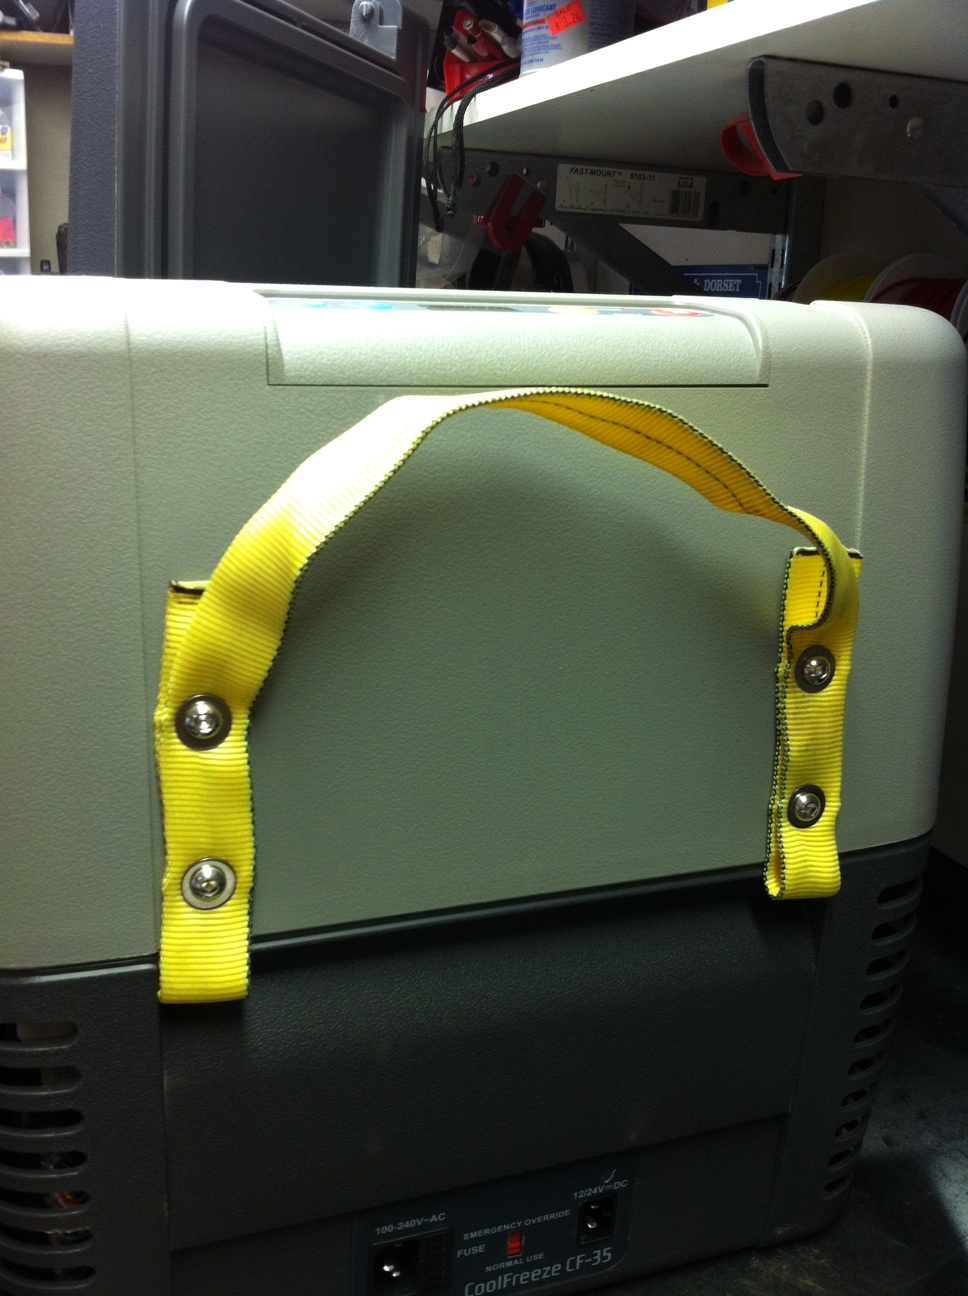
The fridge doesn't fit in the galley with the handles on, as many know, and I have been lifting it by the very small ledges all this time. Every so often I feel a little click (when it is really full and heavy), and I was getting nervous. Plus, after giving up rock climbing, my fingers are nowhere near as strong as they used to be!

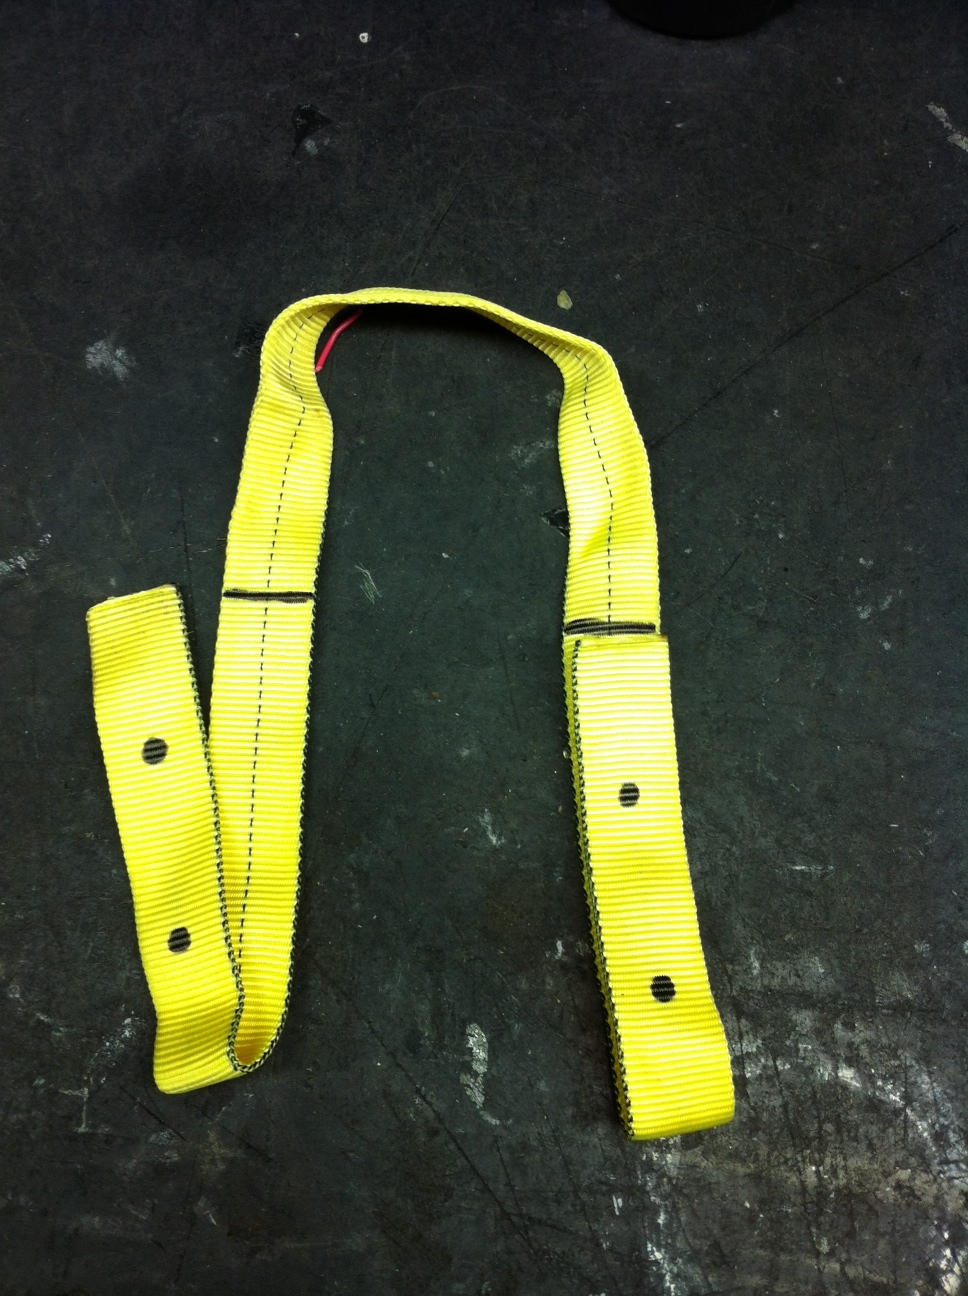
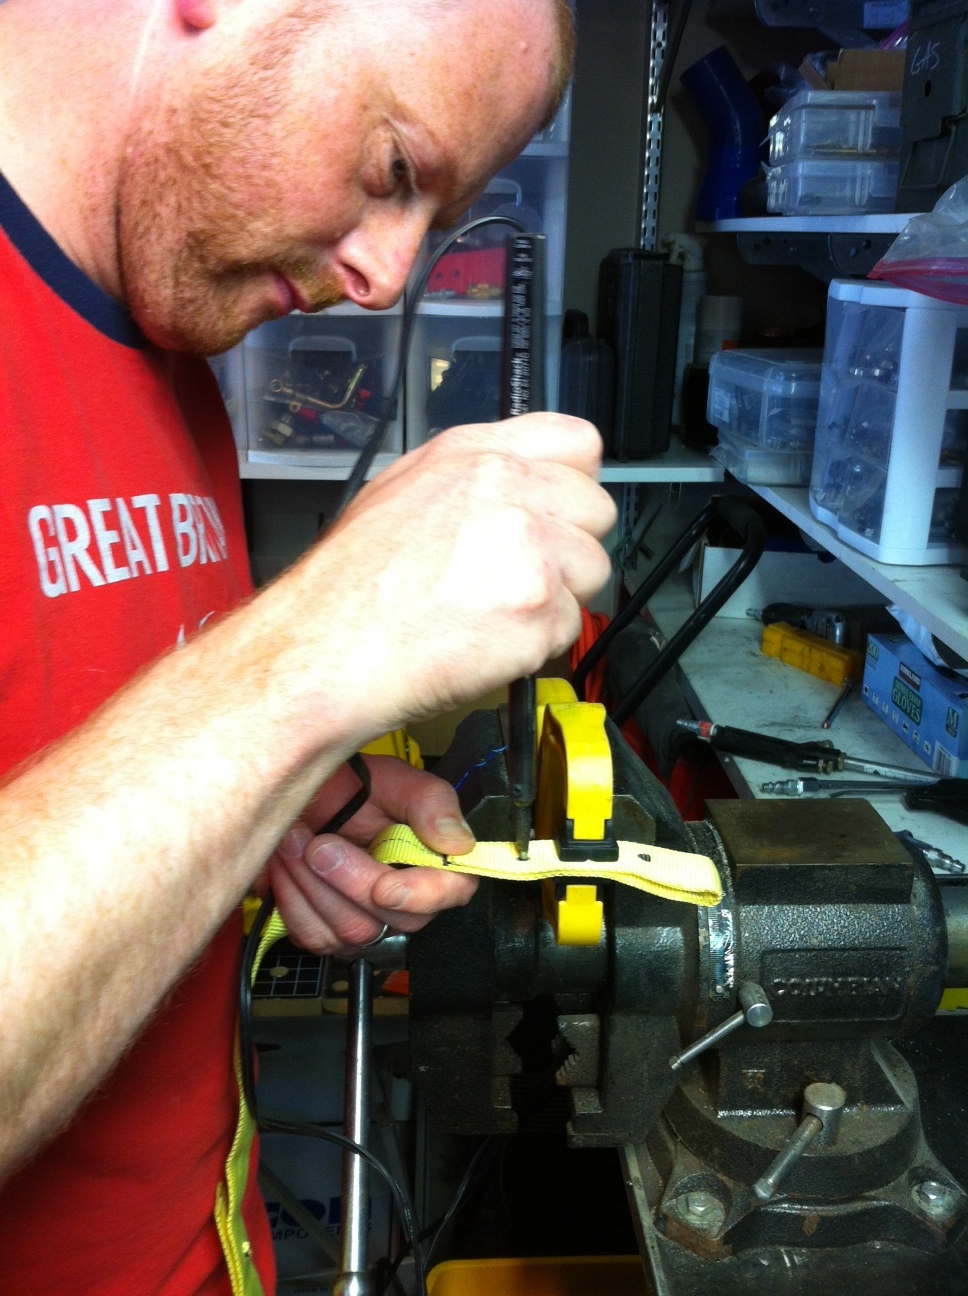
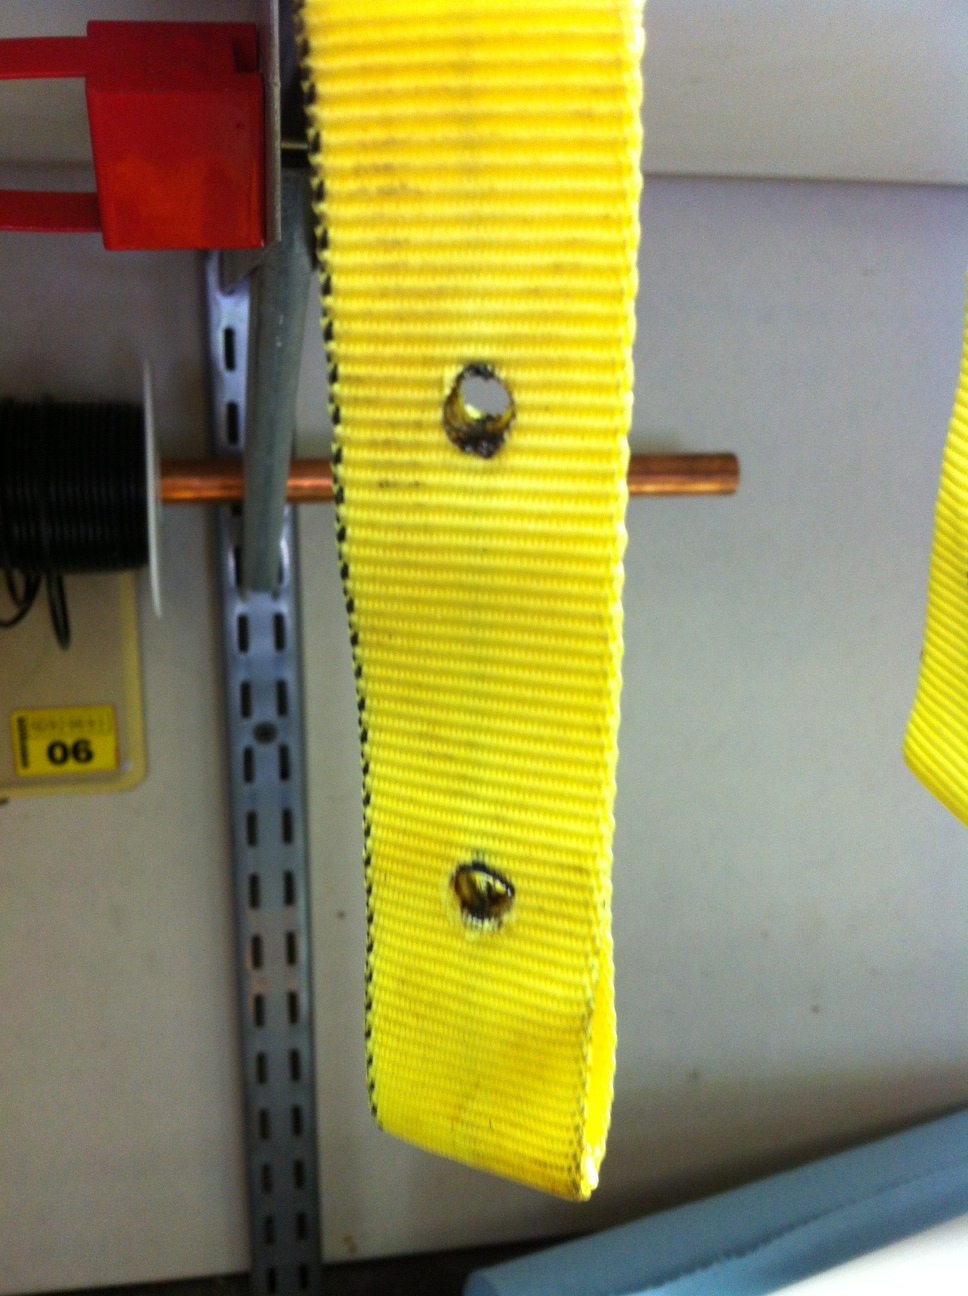
After some thought, I came up with this handle solution. We had most of the parts at home (the screws that came with the handles would have worked, but I swapped them out as I know the parts I used are stainless and won't rust).

Everything slides in easily, and lifting is a breeze!
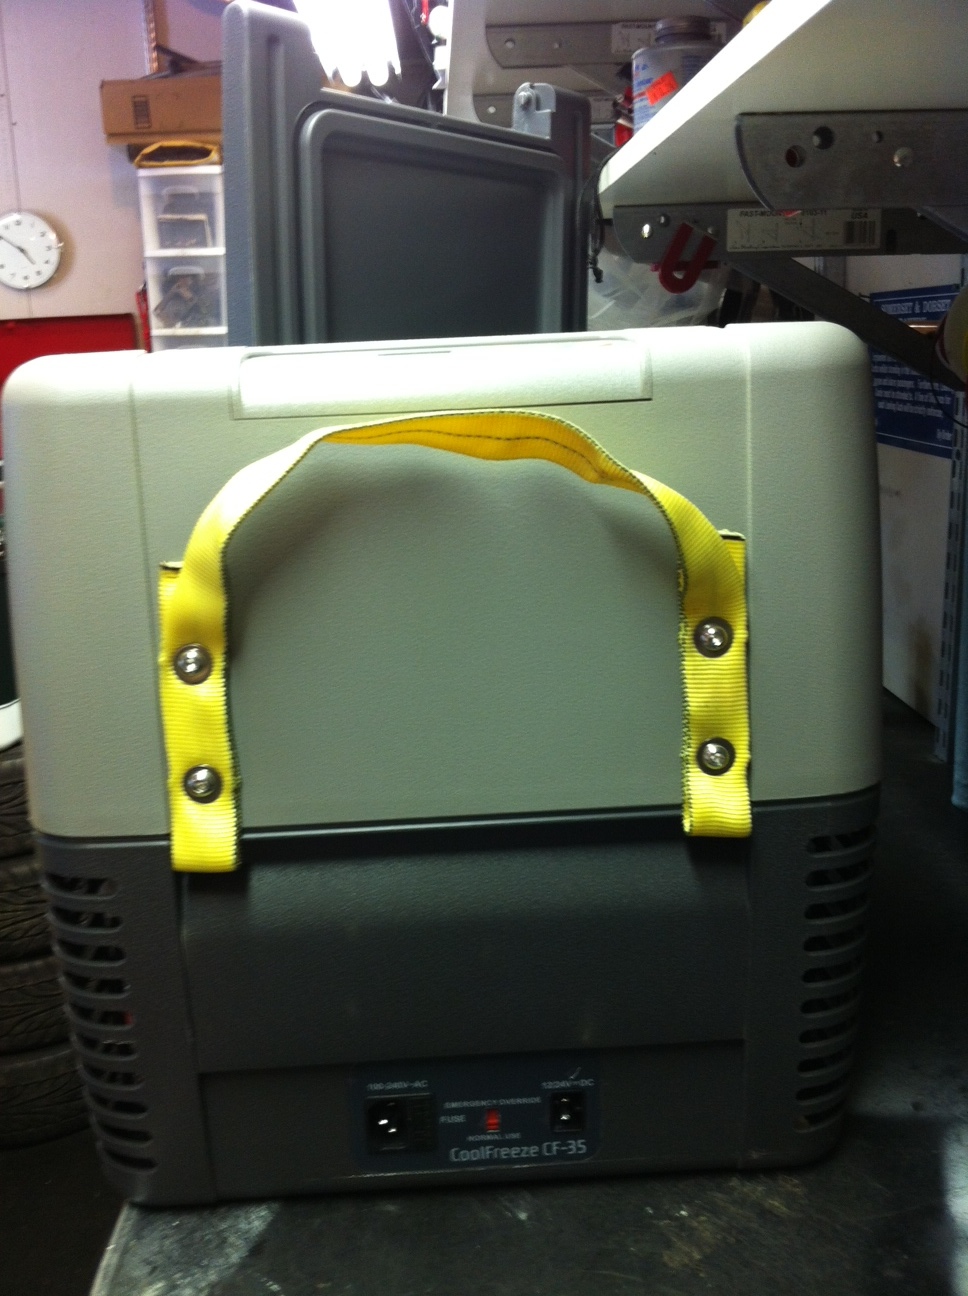
Fridgehandle.jpg
 
Stephen (and/or Shirley). It is a piece of 1" webbing Mick had laying around. You can get them at most sporting good stores (or REI). Come to think of it, I bet Home Depot, or the like, would have it too. I didn't actually measure it out, but I am guessing each side took around 18" of webbing for a handle the size I made.

Side note, the screws are metric also, so you will want to look for a size 6 if you want to replace them. These also sit a little more flush with the fridge and I figured I would be less likely to catch myself on them (the ones that came with it will stick out about 3/8").

Thanks Joan! Mick came in and was telling me how impressed he was with my design. Been a big day of that for me...working on making new cushions for the outdoor furniture too...dang, foam is expensive! Especially the stuff for our climate. Hopefully the cushions come out half as well as the handles. I am not a great seamstress.
 
Sarah, I forgot to add how impressed I was with your solution. You should work for the engineering company I work for and you can design bridges for us. BTW, aren't you going to add a Nike Swoosh to the webbing?

Stephen
 
Nope Stephen, no Swoosh! Then I would have to pay them royalties!

Maybe I should look at building bridges. Portland needs to replace several of them (or at least fix them). :)

Or, maybe I should just patent this! :) Ha ha!

Oh, and Mick said he did get the webbing from REI.

Joan,
I laid it all out how I wanted it, marked where the ends should line up, and where the holes went. Mick has an old soldering iron we use to burn holes through the middle of 2-layers of the webbing (it isn't his good one he uses for the cars, but it kind of burned the 2 layers together a bit too and held them in place). I ran to A-boy and grabbed 8 flat washers and 8 size 6 domed screws that were about 1/8-1/4" shorter than the ones that came with the cooler (all of them are stainless steel...the washers were $0.11/each and the screws were $1.30/each). With the webbing being burned, it is strong. Then with the washer and the shorter screw, it really pushes the webbing up against the cooler tight, reducing stress on the hole. I will post pictures of the process. Wasn't sure how many people might be interested, but took pictures just in case.
 
First, I lined up where the double backed bit needed to line up, so Mick would make sure things didn't move too much. Then I marked where I wanted the holes to be.
handle1.jpg


Mick used his old soldering iron to burn the holes through the webbing. He clamped them down first to keep the 2 bits fom moving around.
handle2.jpg


The holes after they were burned:
handle3.jpg


Then I put the screw through the washer and tightened it up with an alan wrench. The one that came with your cooler should also work with the screws I bought. For reference, the one I was using was a 4mm.
handle4.jpg


After I took that last picture I noticed things were a little wiggly, so I loosened things up, pulled the webbing down tight, and tightened the screws again. I considered using grommets, but was trying to get away with using things we had around here, and that wasn't in "stock". By the time I hit the hardware store, we already had this plan in place. You could do grommets, but we feel pretty sure the webbing (it is tubular webbing, so technically there are 4 layers there), plus the burning, plus the washers are going to be plenty strong. I suppose time will tell!

By the way, thanks for all of the compliments! You all know how to make a girl feel clever! I like that feeling!
 
I went to REI today to get some straps and found these straps in the cargo carrier sections. I decided to buy four and see if they would work.

freez.jpg


The next step will be to find some handles or put ends on the handles that came with the freezer so that the straps do not slide off. I will probably also replace the screws so that they are flush.

I am thinking about putting another grommet in each of the strap so that I can attach the straps with all of the screws.
 
Looks good, Joan - but I would try to get that second set of screws in there. When the fridge is full there's going to a lot of weight on these screws.
 
Joan,

I would be worried about the freezer handles sliding and upsetting fridge balance while carrying, thus possibly dumping the fridge.

If you are able to attach the straps like Mik and Sarah, the tube may be inserted on the top, which may add more comfort while moving.

Great modification ideas everybody.
 
OK, I was waiting until I had a chance to get these and put them on the frig before I shared them with you. But since everyone is thinking of taking Sarah's brilliant idea to the next level this might be the answer. Joan is on the right track, but I agree that the weight of a loaded frig and the handles not being secured to the straps could create a problem.

You can purchase these handles w/wo the 1" webbing, $3.50 vs $3.75 plus a reasonable shipping charge.

http://www.strapworks.com/Shoulder_Pads_p/tph1.htm

I should have them in a few days, so I'll let you know how they work out.
7544076346_44a04b59dc.jpg


UPDATE:THE HANDLES DON'T FIT IN THE COOLER SPACE a miss-measurement (by a 1/4") dashed my hopes of a cool solution. The handles have a hard plastic tube inside the webbing that is bonded to the handle so it's too ridged to squeeze in there.

On another note, with the exception of Duck Tape, anyone have a suggestion on how to repair this insulated cover?

7514923486_b8a5757c09.jpg
7514947292_cfb0297897.jpg
 
Last edited by a moderator:
Back
Top