Build Photos My Build Has Started!

wonko

Novice
Hooray, I'll have something to mount my towel holder on soon!

293.jpg

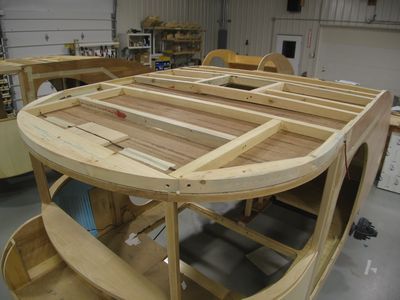
The body assembly is started on the side to help keep everything square.

294.jpg

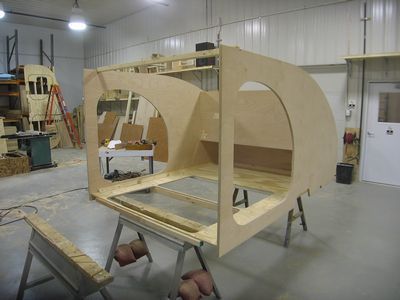
Then it is put on saw horses.

295.jpg

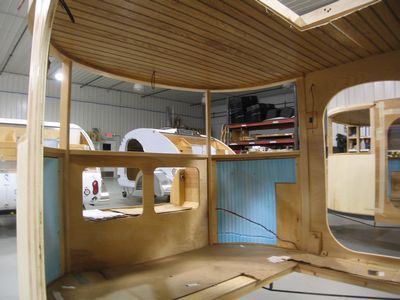
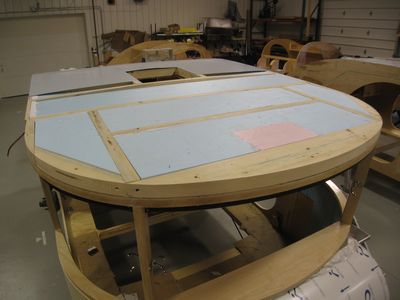
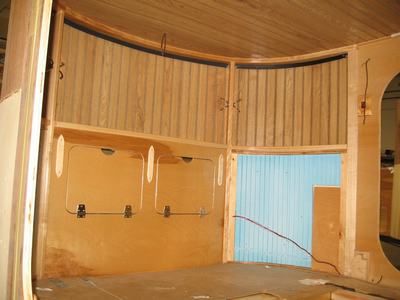
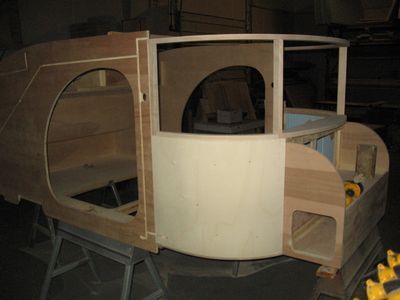
Working on the kitchen area.

296.jpg

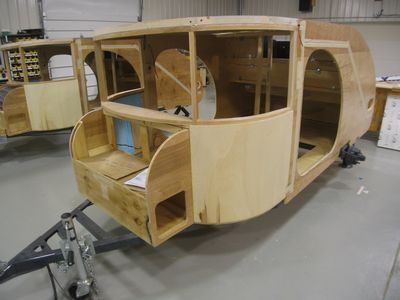
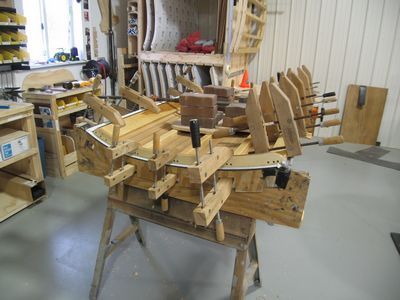
Assembling the front.

297.jpg

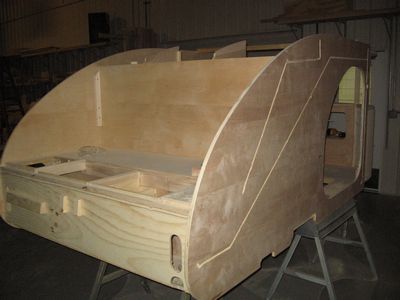
Finishing the front assembly.

298.jpg

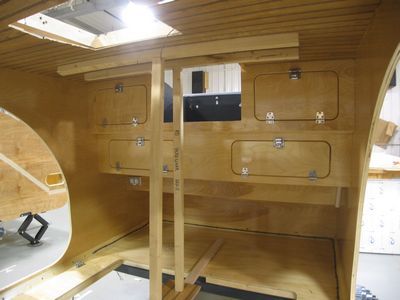
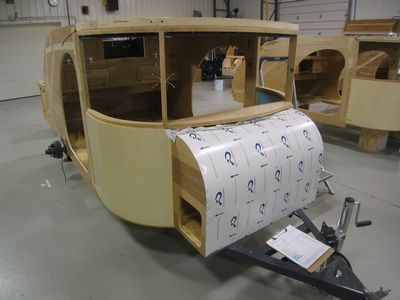
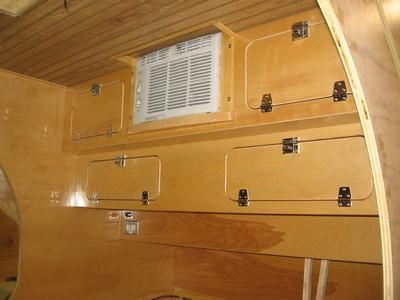
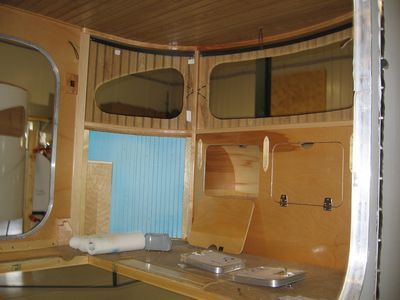
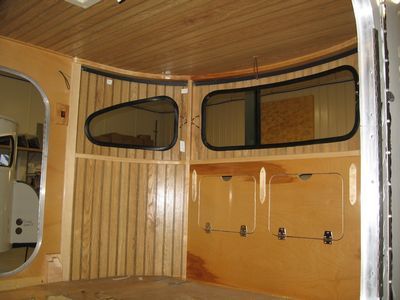
The kitchen is complete.

299.jpg

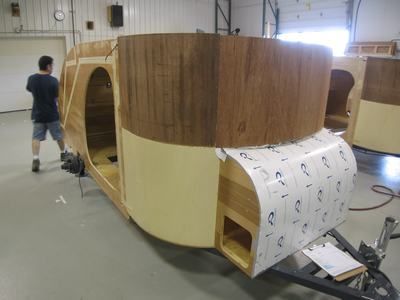
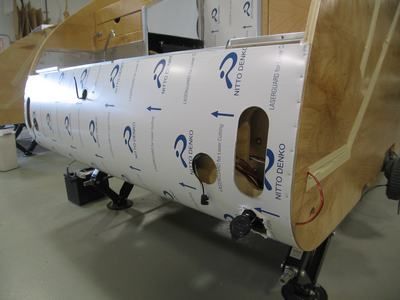
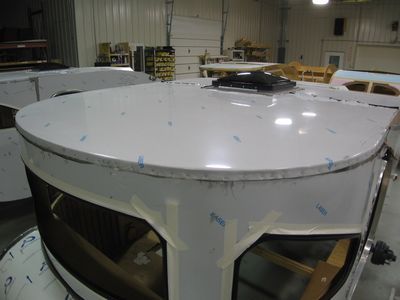
The assembled body is varnished on a rotisserie so we can reach every surface.

300.jpg

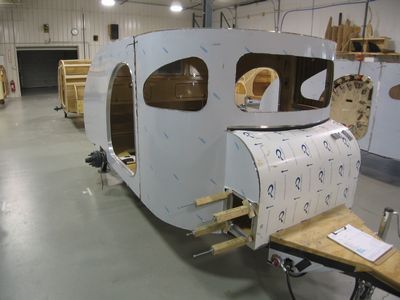
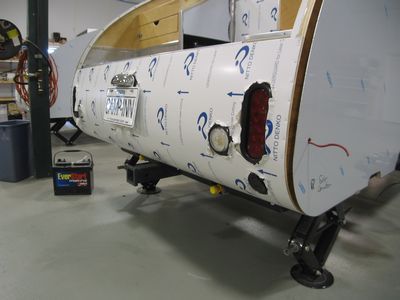
The varnished body is ready to mount on the trailer frame.
 
Lyle, these progress photos are very, very much appreciated. My 560 Ultra is due for a mid-July completion, so it really helps me to see yours under construction a month or so ahead of mine (don't they say something like five to seven weeks to build? That would mean starting mine two to four weeks from now).

One major purpose I have for wanting to collect as many 560 Ultra build photos as possible is that if I ever (when I ever) want to drill into trailer surfaces or do minor mods down the road, it will help to be able to look back at the photos to make sure there is likely nothing there to damage. ("As-builts," as we engineers would call 'em). Wish everybody would post their build photos as you and a few others have.

Again, thanks.

Jim
 
Jim,

You likely already know this but you will get a CD with all of your build pictures when you pick up your 560. You will also get hi-res versions too. Maybe you could talk Craig into checking if he could share a couple of other build CD's with you. This would give you hi-res images with less work than collecting them off the web.

The Camp Inn folks are "full service".
 
Wonderful idea, guys. The Camp-Inn folks have indeed been exceptionally responsive, well beyond anything one would ordinarily expect of the proprietors of a small business who must have so many things to take care of. I almost -- no, not "almost" -- I DO feel guilty when I e-mail them and they respond so promptly and thoroughly.

They should be glad I'm not local to them. I'd be there every couple of days with my digital camera to take fifty or a hundred high-res closeups of every inch of that build! Love dem digitals!
 
Jim,
I kept an email folder titled "trailer". There was a tremendous amount of info exchanged. After a few months, nearly every email began with an apology for troubling them. Cary told me he had some horror stories about problem customers and I was minor player.
This forum did not exist when we bought ours. This certainly keeps the excitement level up. Lots of good ideas too. Camp-Inn stands out as the paradigm of customer service.

Steve
 
Evan,

While you may have caused Craig some stress with the stereo install, I don't think you made the list :). I always say we have a big extended family here at Camp-Inn and that includes a couple crazy uncles. None of which are here.

It is interesting that both you and Steve are bringing this up. Because both of you did ask me later if you had drove us crazy with questions and such during your builds. I got a kick out of that in both cases.

Cary
 
I see by the photos that a lot of glueing and clamping takes place. Do you use fastners along with glue, or just glue. What kind of glue? Hopefully not asking trade secrets! ;)
 
Here are some more pictures...

322.jpg

The body is mounted to the trailer frame

323.jpg

The roof structure is added

324.jpg

Headliner is installed

325.jpg

Interior cabinets are hung

326.jpg

Started the wiring in the kitchen area

327.jpg

In the nest... Mine is the second from the left

328.jpg

The front storage box is skinned. White is a protective coating.

329.jpg

Assembling the doors

330.jpg

The roof is insulated
 
Lyle, now is the time to have that cable for the solar panel run thru the ceiling onto your roof.
 
Except that I don't plan to mount it on the roof. Having the trailer in the shade and the panel in the sun some distance away appeals to me more.
 
Here's what there is for week 4. I must admit to a small shock of fear when looking at picture 19 (The inside is panelled.) It sure looks like no windows are planned to be installed, but they must cut holes in the installed panels at a later step.

358.jpg

The front is covered.

359.jpg

The inside is panelled.

360.jpg

The air conditioner is installed.

361.jpg

Rear roll pan is skinned.

362.jpg

Stainless countertops are added. Kitchen cabinets are assembled and installed.

363.jpg

Stove is mounted.
 
OK, looks like I ordered the window option :D

403.jpg

Tail lights are wired.

404.jpg

Front and sides are skinned.

405.jpg

Tail lights are wired.

406.jpg

Hatch is assembled.

407.jpg

The roof is skinned.

408.jpg

the lower front is panelled.
 
So, the two mini doors sitting inside your rig must mean that you didn' go with the propane furnace?
 
Back
Top